剪藏
Rethinking your position
Learn how to learn
3R编码 | nestjs最佳实践 - 课程概览
3R编码 | Node.js开发环境搭建
3R编码 | Nestjs+Eslint+SWC应用初始化及断点调试
3R编码 | 装饰器与反射
3R编码 | Nestjs核心概念
3R编码 | 无懈可击的Linux服务器构建
3R编码 | 使用Turborepo+pnpm workspaces构建monorepo应用
3R编码 | 使用Gitea+Drone自建CICD平台
3R编码 | 整合Typeorm实现CRUD
3R编码 | 请求数据的验证和响应数据的序列化
3R编码 | 数据关联与树形嵌套结构的分类和评论的实现
3R编码 | 自定义全局的验证管道,拦截器和过滤器
3R编码 | 自定义数据验证约束及约束中的依赖注入
3R编码 | 批量操作及软删除(回收站)功能使用
3R编码 | 数据库与MeiliSearch的全文搜索
3R编码 | 数据操作代码的抽象化
3R编码 | 整合bun与pm2实现开发环境与生产环境免编译和自启
3R编码 | 自建配置系统实现
3R编码 | 嵌套路由与Swagger文档实现
3R编码 | 使用Yargs构建命令行工具
3R编码 | 生产环境下静默启动以及PM2 API的使用
3R编码 | 数据迁移功能的实现
3R编码 | 数据填充命令实现
3R编码 | 用户模块开发以及使用Passport实现JWT认证和无痛刷新
3R编码 | 基于CASL的RBAC动态角色及权限系统实现
3R编码 | 模型动态关联与基于CASL的动态权限的实现
3R编码 | 使用BullMQ实现异步验证短信与邮件发送
3R编码 | WebSocket实现消息广播功能
3R编码 | chapter27
3R编码 | chapter28
3R编码 | TS全栈+AI开发实战 - 课程概览
3R编码 | Node.js环境搭建及应用初始化
3R编码 | Next.js应用初始化
3R编码 | React内置Hooks的使用与自定义详解
3R编码 | Next.js中使用Zustand进行状态管理详解
3R编码 | Next.js核心概念及应用构建
微电子学第1话 MOS Differential Pair (I)
微电子学第1话 MOS Differential Pair (I)
微电子学第3话 CMRR
微电子学第2话 MOS Differential Pair (II)
终于有人讲了,凭什么三极管能放大?
降低人类负担:类型系统即边界
固态变压器SST是什么
本站点使用 MrDoc 构建
-
+
3R编码 | Nestjs核心概念
- 更换http驱动为fastify以提高响应速度 - 控制器及其方法,请求对象及DTO - 提供者概念,自定义提供者,异步提供者,循环依赖,注入范围 - 全局模块,动态模块,模块懒加载和模块参考 提前安装以下后 - lodash 一个通用的JS函数工具库 - class-validator 用于类的验证,本节主要结合DTO对请求数据进行验证 - class-transformer 序列化响应数据,本节用于结合class-validator进行序列化 - @nestjs/swagger nestjs的openapi支持库,本节只使用里面的`PartialType`函数 ``` pnpm add lodash class-validator class-transformer @nestjs/swaggerpnpm add @types/lodash -D ``` 在安装完依赖之后,请用vscode打开项目按`cmd+shift+p`(非mac下`ctrl+shift+p`),打开命令行重新加载窗口。否则在导入依赖时会报错,后续课程不再重复讲 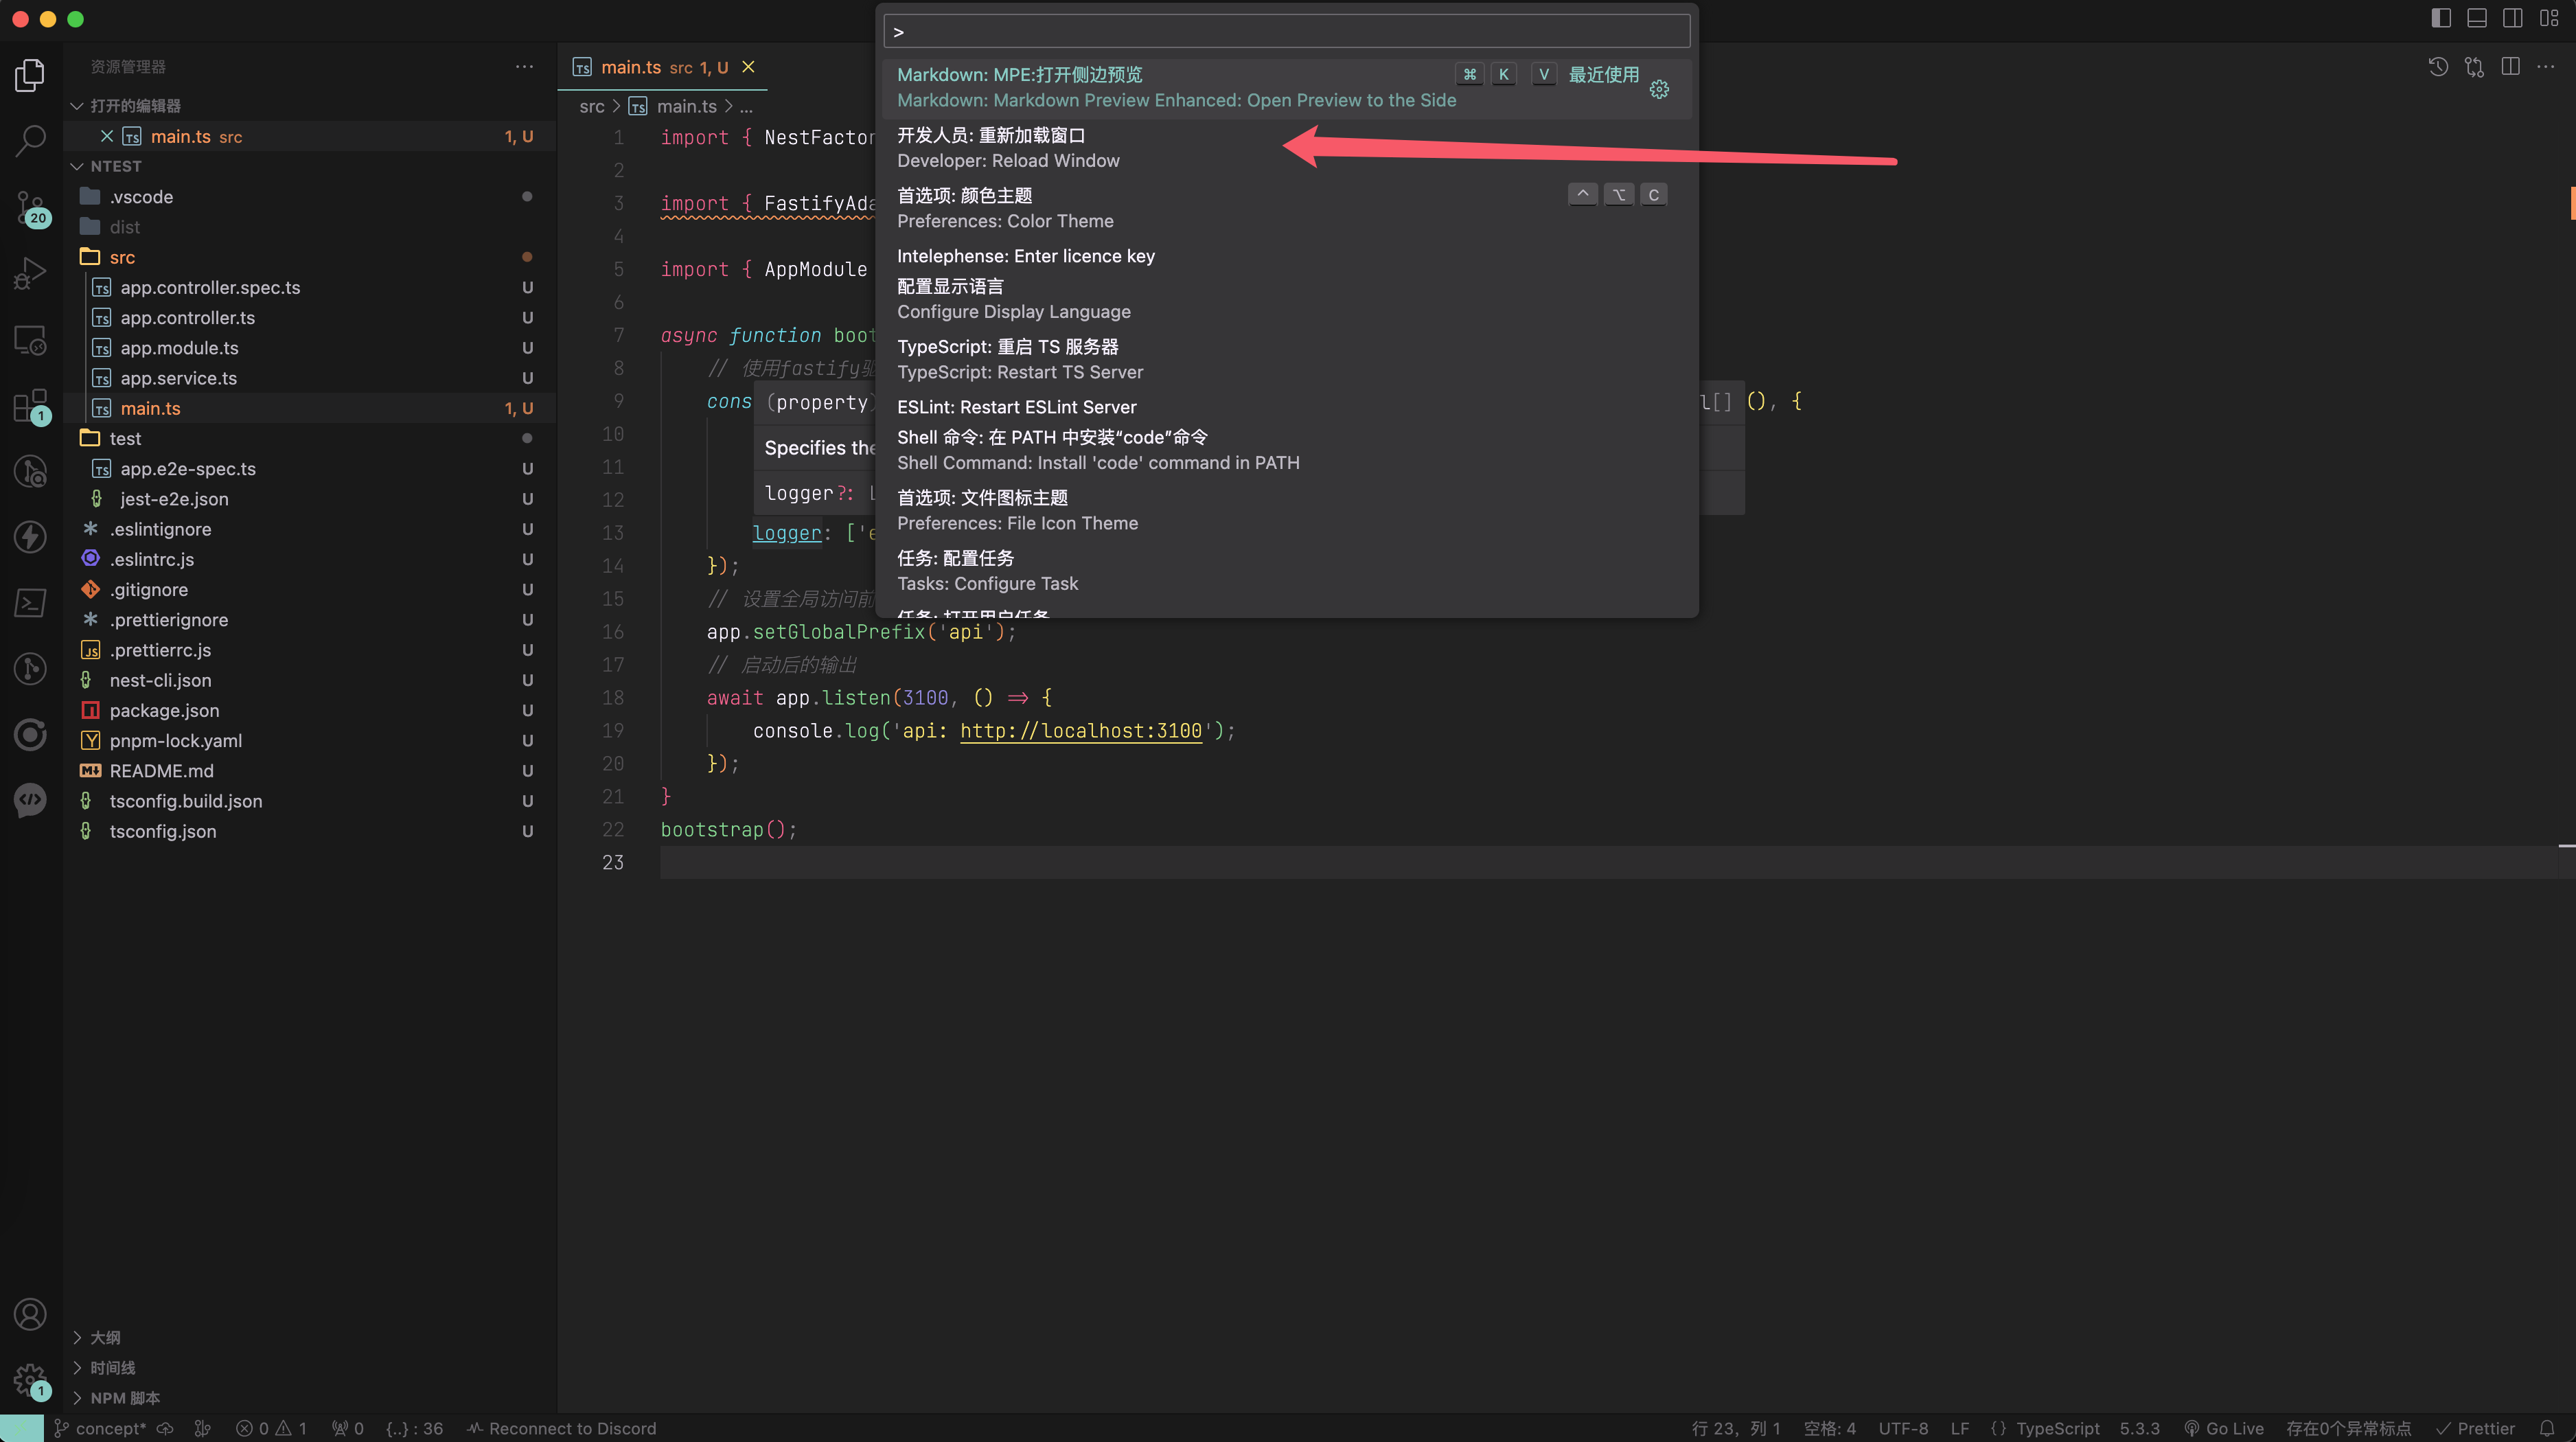 简单的nestjs应用的执行流程大概如下 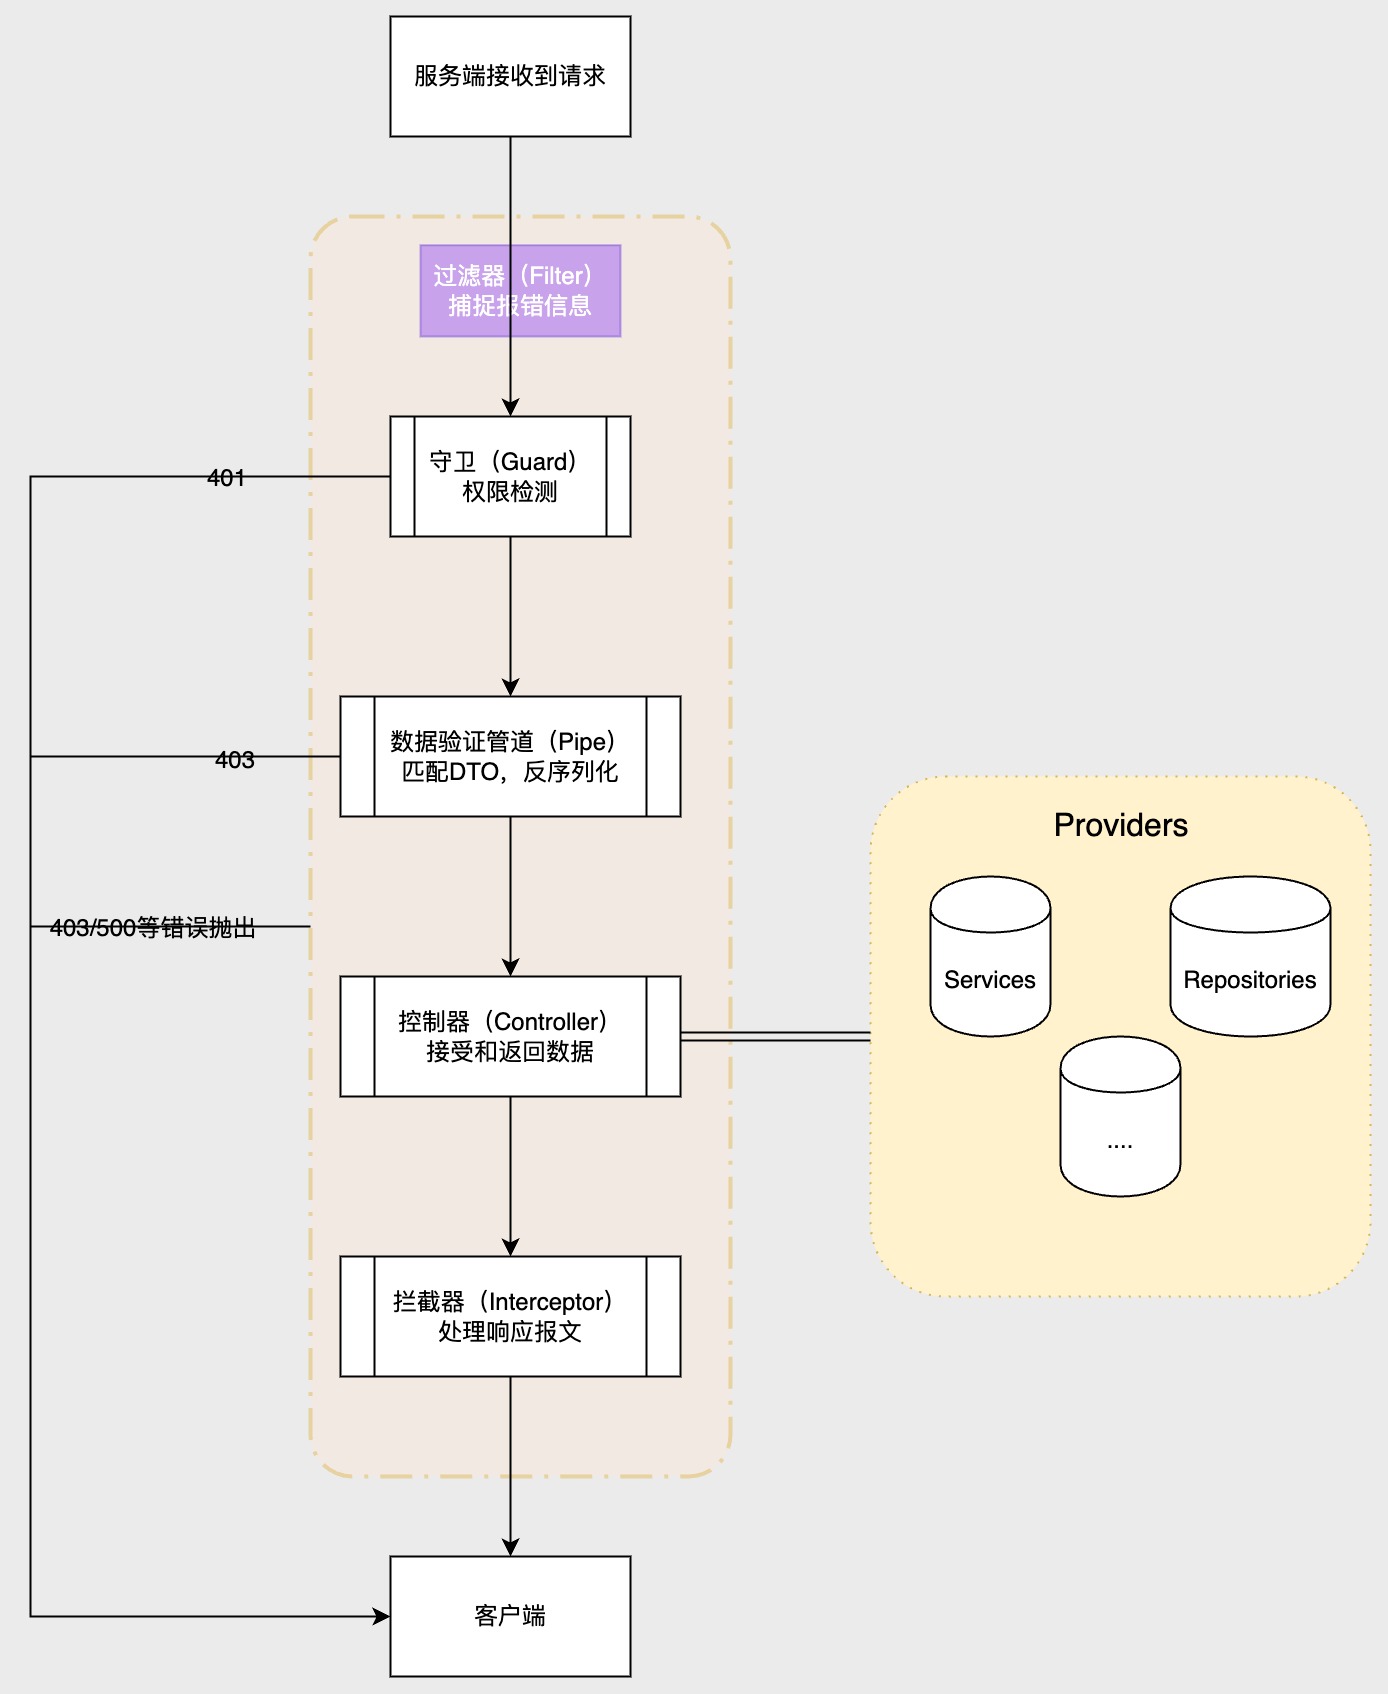 使用fastify代替默认的express,以提高应用的http响应速度 先安装fastify驱动 提示 如果在安装依赖后,vscode导入该依赖的模块(如`@nestjs/platform-fastify`)时仍然报错的情况,请像上节课一样重新加载一下vscode的窗口 ``` pnpm add fastify @nestjs/platform-fastify && pnpm remove @nestjs/platform-express @types/express ``` 代码如下 ``` // src/main.tsimport { NestFactory } from '@nestjs/core';import { FastifyAdapter, NestFastifyApplication } from '@nestjs/platform-fastify';import { AppModule } from './app.module';async function bootstrap() { // 使用fastify驱动 const app = await NestFactory.create<NestFastifyApplication>(AppModule, new FastifyAdapter(), { // 启用跨域访问 cors: true, // 只使用error和warn这两种输出,避免在控制台冗余输出 logger: ['error', 'warn'], }); // 设置全局访问前缀 app.setGlobalPrefix('api'); // 启动后的输出 await app.listen(3100, () => { console.log('api: http://localhost:3100'); });}bootstrap(); ``` 启动开发服务器 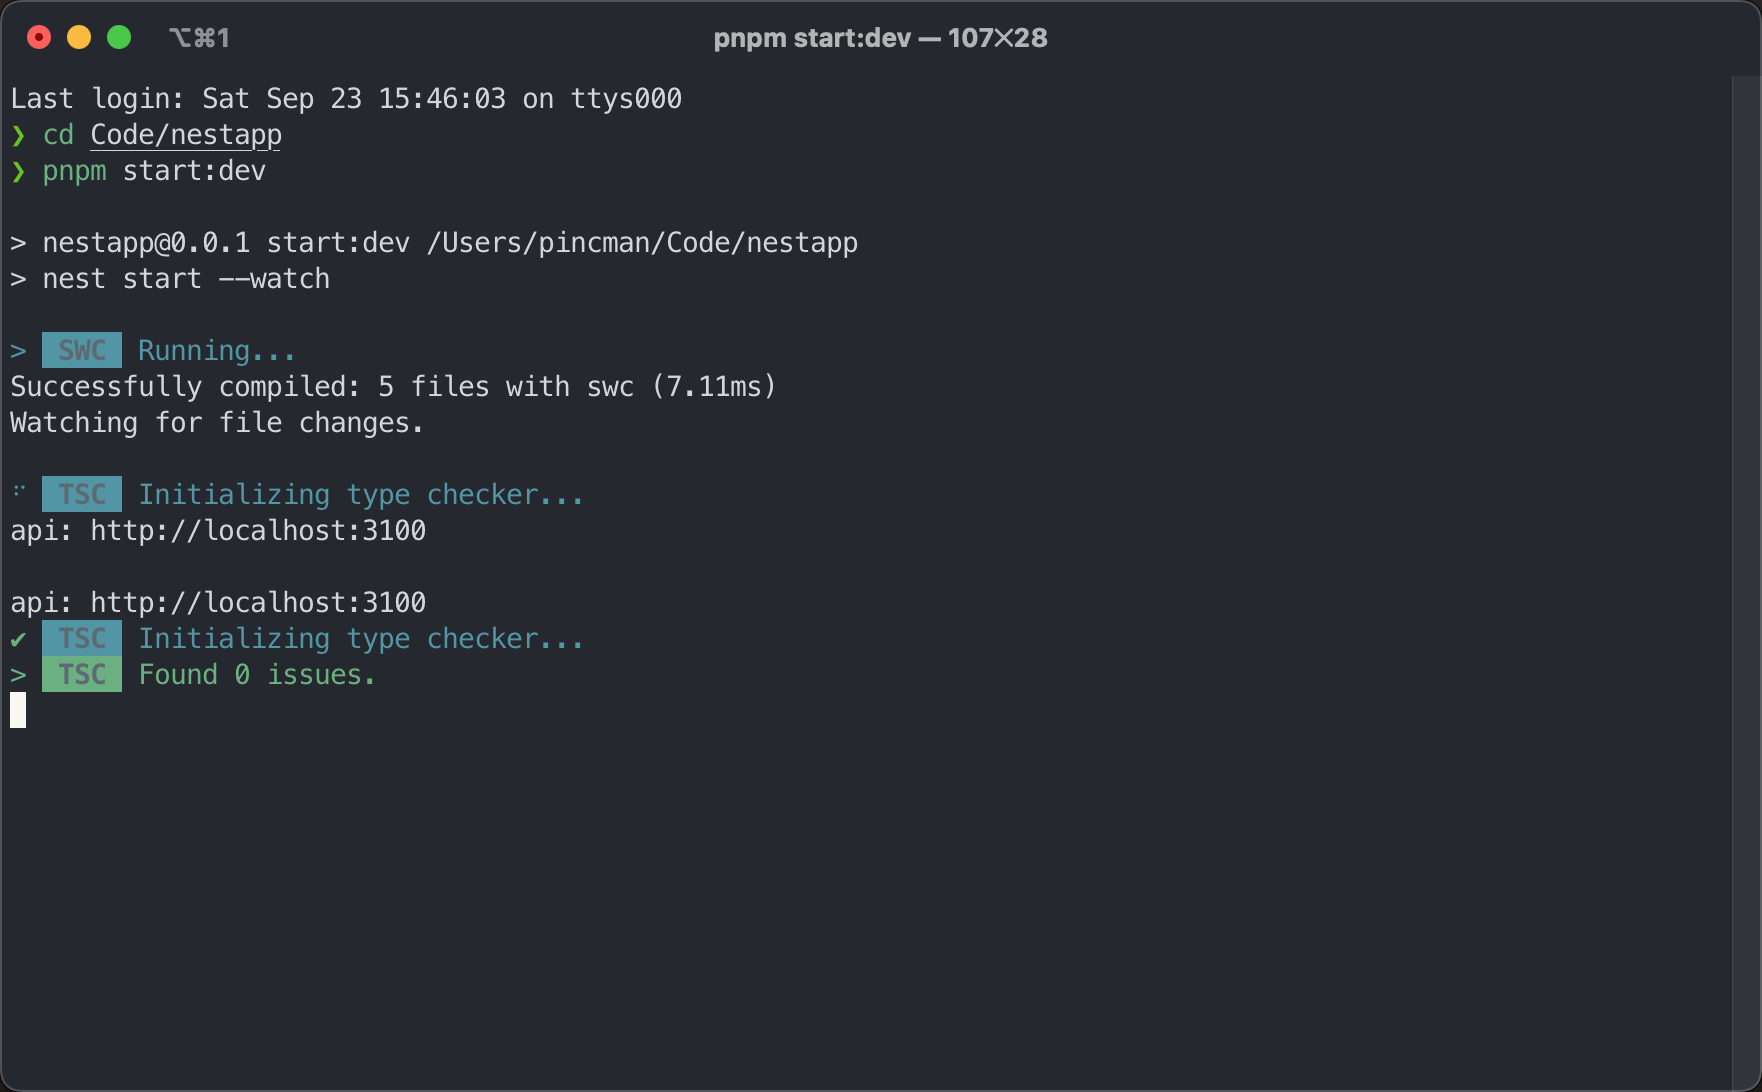 添加一些常用的全局类型 ``` // typings/global.d.tsdeclare type RecordAny = Record<string, any>;declare type RecordNever = Record<never, never>;declare type RecordAnyOrNever = RecordAny | RecordNever;/** * 基础类型接口 */declare type BaseType = boolean | number | string | undefined | null;/** * 环境变量类型转义函数接口 */declare type ParseType<T extends BaseType = string> = (value: string) => T;/** * 类转义为普通对象后的类型 */declare type ClassToPlain<T> = { [key in keyof T]: T[key] };/** * 一个类的类型 */declare type ClassType<T> = { new (...args: any[]): T };/** * 嵌套对象全部可选 */declare type RePartial<T> = { [P in keyof T]?: T[P] extends (infer U)[] | undefined ? RePartial<U>[] : T[P] extends object | undefined ? T[P] extends ((...args: any[]) => any) | ClassType<T[P]> | undefined ? T[P] : RePartial<T[P]> : T[P];};/** * 嵌套对象全部必选 */declare type ReRequired<T> = { [P in keyof T]-?: T[P] extends (infer U)[] | undefined ? ReRequired<U>[] : T[P] extends object | undefined ? T[P] extends ((...args: any[]) => any) | ClassType<T[P]> | undefined ? T[P] : ReRequired<T[P]> : T[P];};/** * 防止SWC下循环依赖报错 */declare type WrapperType<T> = T; // WrapperType === Relation ``` ### 创建模块[](#创建模块 "创建模块的直接链接") Nestjs的代码组织方式是以模块为单位的,对于非常小的应用,全部编写在`AppModule`中即可。而一般的情况下,我们使用多个模块来组织代码结构。 使用`nest g mo modules/content`创建一个`content`模块 提示 严重建议初学者建议手动添加模块,服务这些,这样更清晰,不要一开始就用cli生成,站长也基本不怎么使用cli命令(除了后续课程自己编写的迁移生成这些命令外) 生成代码如下 ``` // src/modules/content/content.module.tsimport { Module } from '@nestjs/common';@Module({})export class ContentModule {} ``` 并自动会在`AppModule`中导入 ``` // src/app.module.ts@Module({ imports: [ContentModule], controllers: [AppController], providers: [AppService],})export class AppModule {} ``` ### 控制器定义[](#控制器定义 "控制器定义的直接链接") 使用`@Controller('路由路径')`来指定控制器 可以使用 `nest g co modules/content/controllers/post --no-spec --flat`命令生成或手动添加一下文件和代码 给`content`模块下下面添加一个post控制器,如下 ``` // src/modules/content/controllers/post.controller.tsimport { Controller } from '@nestjs/common';@Controller('posts')export class PostController {} ``` 在`content`并导入`PostController`,如下 ``` // src/modules/content/content.module.tsimport { Module } from '@nestjs/common';import { PostController } from './controllers/post.controller';@Module({ controllers: [PostController],})export class ContentModule {} ``` ### 请求方法[](#请求方法 "请求方法的直接链接") 控制器的请求方法如下 - `@Get`用于获取数据 - `@Post`用于新增数据 - `@Patch`用于更新部分数据 - `@Put`用于更新全部数据 - `@Delete`用于删除数据 - `@Options`用于对cors的跨域预检(一般用不到) - `@Head`用于自定义请求头,常用于下载,导出excel文件等 ### 请求对象[](#请求对象 "请求对象的直接链接") > 本节主要讲解`@Params`,`@Body`,其它的会在后面的学习中逐步讲解 可以通过以下装饰器获取需要的请求对象 - `@Request(), @Req()`: 请求数据 - `@Response(), @Res()`: 响应数据 - `@Next()`: 执行下一个中间件(一般用不到) - `@Session()`: session对象(一般用不到) - `@Param(key?: string)`: 获取url中的params参数,比如 `posts/1` - `@Body(key?: string)`:请求主体数据,一般结合DTO使用,用于新增或修改数据 - `@Query(key?: string)`:获取url中的查询数据,比如`posts?page=1` - `@HttpCode(statusCode: number)`:指定响应码,比如`@HttpCode(200)` - `@Redirect(url:string,statusCode:number)`:跳转到其它url,比如\`@Redirect('/ccc',301) 接下来我们编写一个示例 首先添加一个`PostEntity`类型,用于虚拟一个数据模型 ``` // src/modules/content/types.tsexport interface PostEntity { id: number; title: string; summary?: string; body: string;} ``` 接下来编写控制器 ``` // src/modules/content/controllers/post.controller.tsimport { Body, Controller, Delete, Get, NotFoundException, Param, Patch, Post,} from '@nestjs/common';import { isNil } from 'lodash';import { PostEntity } from '../types';let posts: PostEntity[] = [ { title: '第一篇文章标题', body: '第一篇文章内容' }, { title: '第二篇文章标题', body: '第二篇文章内容' }, { title: '第三篇文章标题', body: '第三篇文章内容' }, { title: '第四篇文章标题', body: '第四篇文章内容' }, { title: '第五篇文章标题', body: '第五篇文章内容' }, { title: '第六篇文章标题', body: '第六篇文章内容' },].map((v, id) => ({ ...v, id }));@Controller('posts')export class PostController { @Get() async index() { return posts; } @Get(':id') async show(@Param('id') id: number) { const post = posts.find((item) => item.id === Number(id)); if (isNil(post)) throw new NotFoundException(`the post with id ${id} not exits!`); return post; } @Post() async store(@Body() data: PostEntity) { const newPost: PostEntity = { id: Math.max(...posts.map(({ id }) => id + 1)), ...data, }; posts.push(newPost); return newPost; } @Patch() async update(@Body() data: PostEntity) { let toUpdate = posts.find((item) => item.id === Number(data.id)); if (isNil(toUpdate)) throw new NotFoundException(`the post with id ${data.id} not exits!`); toUpdate = { ...toUpdate, ...data }; posts = posts.map((item) => (item.id === Number(data.id) ? toUpdate : item)); return toUpdate; } @Delete(':id') async delete(@Param('id') id: number) { const toDelete = posts.find((item) => item.id === Number(id)); if (isNil(toDelete)) throw new NotFoundException(`the post with id ${id} not exits!`); posts = posts.filter((item) => item.id !== Number(id)); return toDelete; }} ``` ### 测试接口[](#测试接口 "测试接口的直接链接") 因为本节课还没有涉及到前端CRUD页面的开发和E2E,TDD测试等概念,也没有涉及到太复杂的接口,所以我们简单的使用CURL来测试API 使用`pnpm start:dev`启动app 然后打开一个新的命令窗口安装格式化依赖`json` ``` pnpm -g add json ``` 强烈建议在vscode里的shell窗口启动应用(使用`ctrl+~`打开),然后再点`x`或者按`ctrl+~`隐藏该窗口,需要看console输出时再打开即可。而在外面的命令窗口运行其他命令 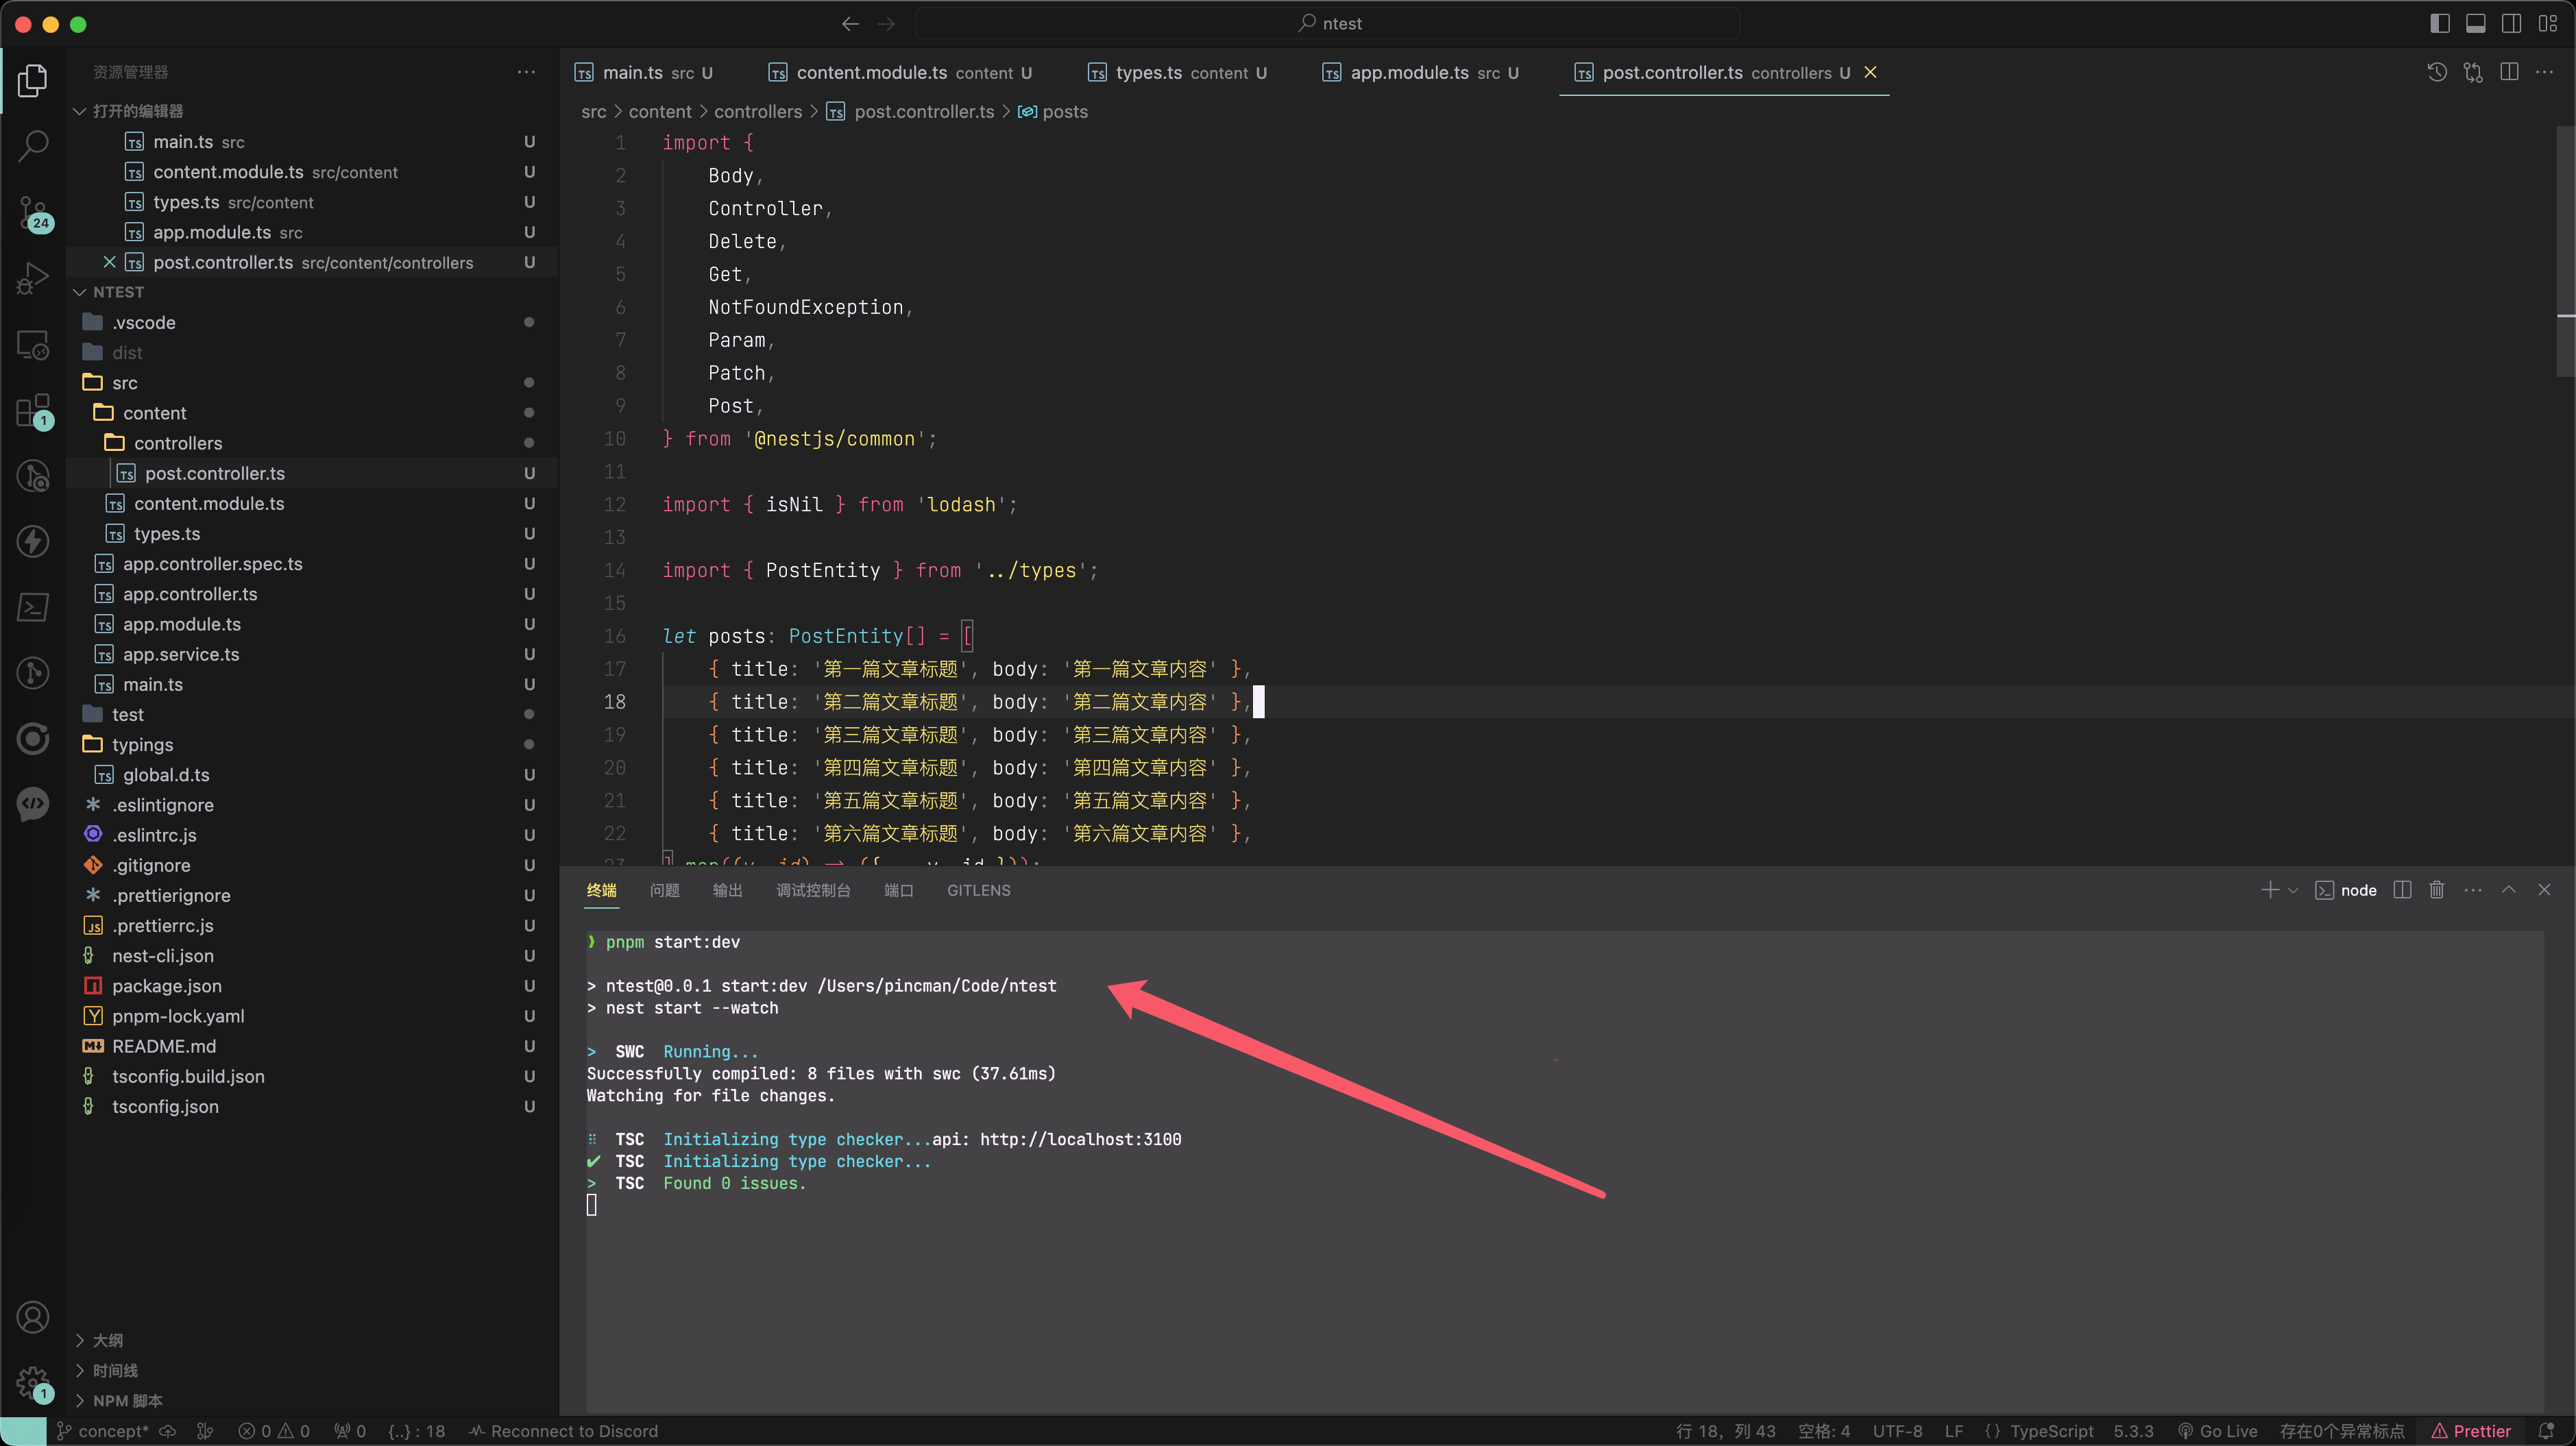 下面,我们就可以来测试接口了。打开新的命令窗口运行以下命令,看一下我们的接口是否正常 #### 查询所有数据[](#查询所有数据 "查询所有数据的直接链接") ``` curl http://localhost:3100/api/posts -s | json ``` 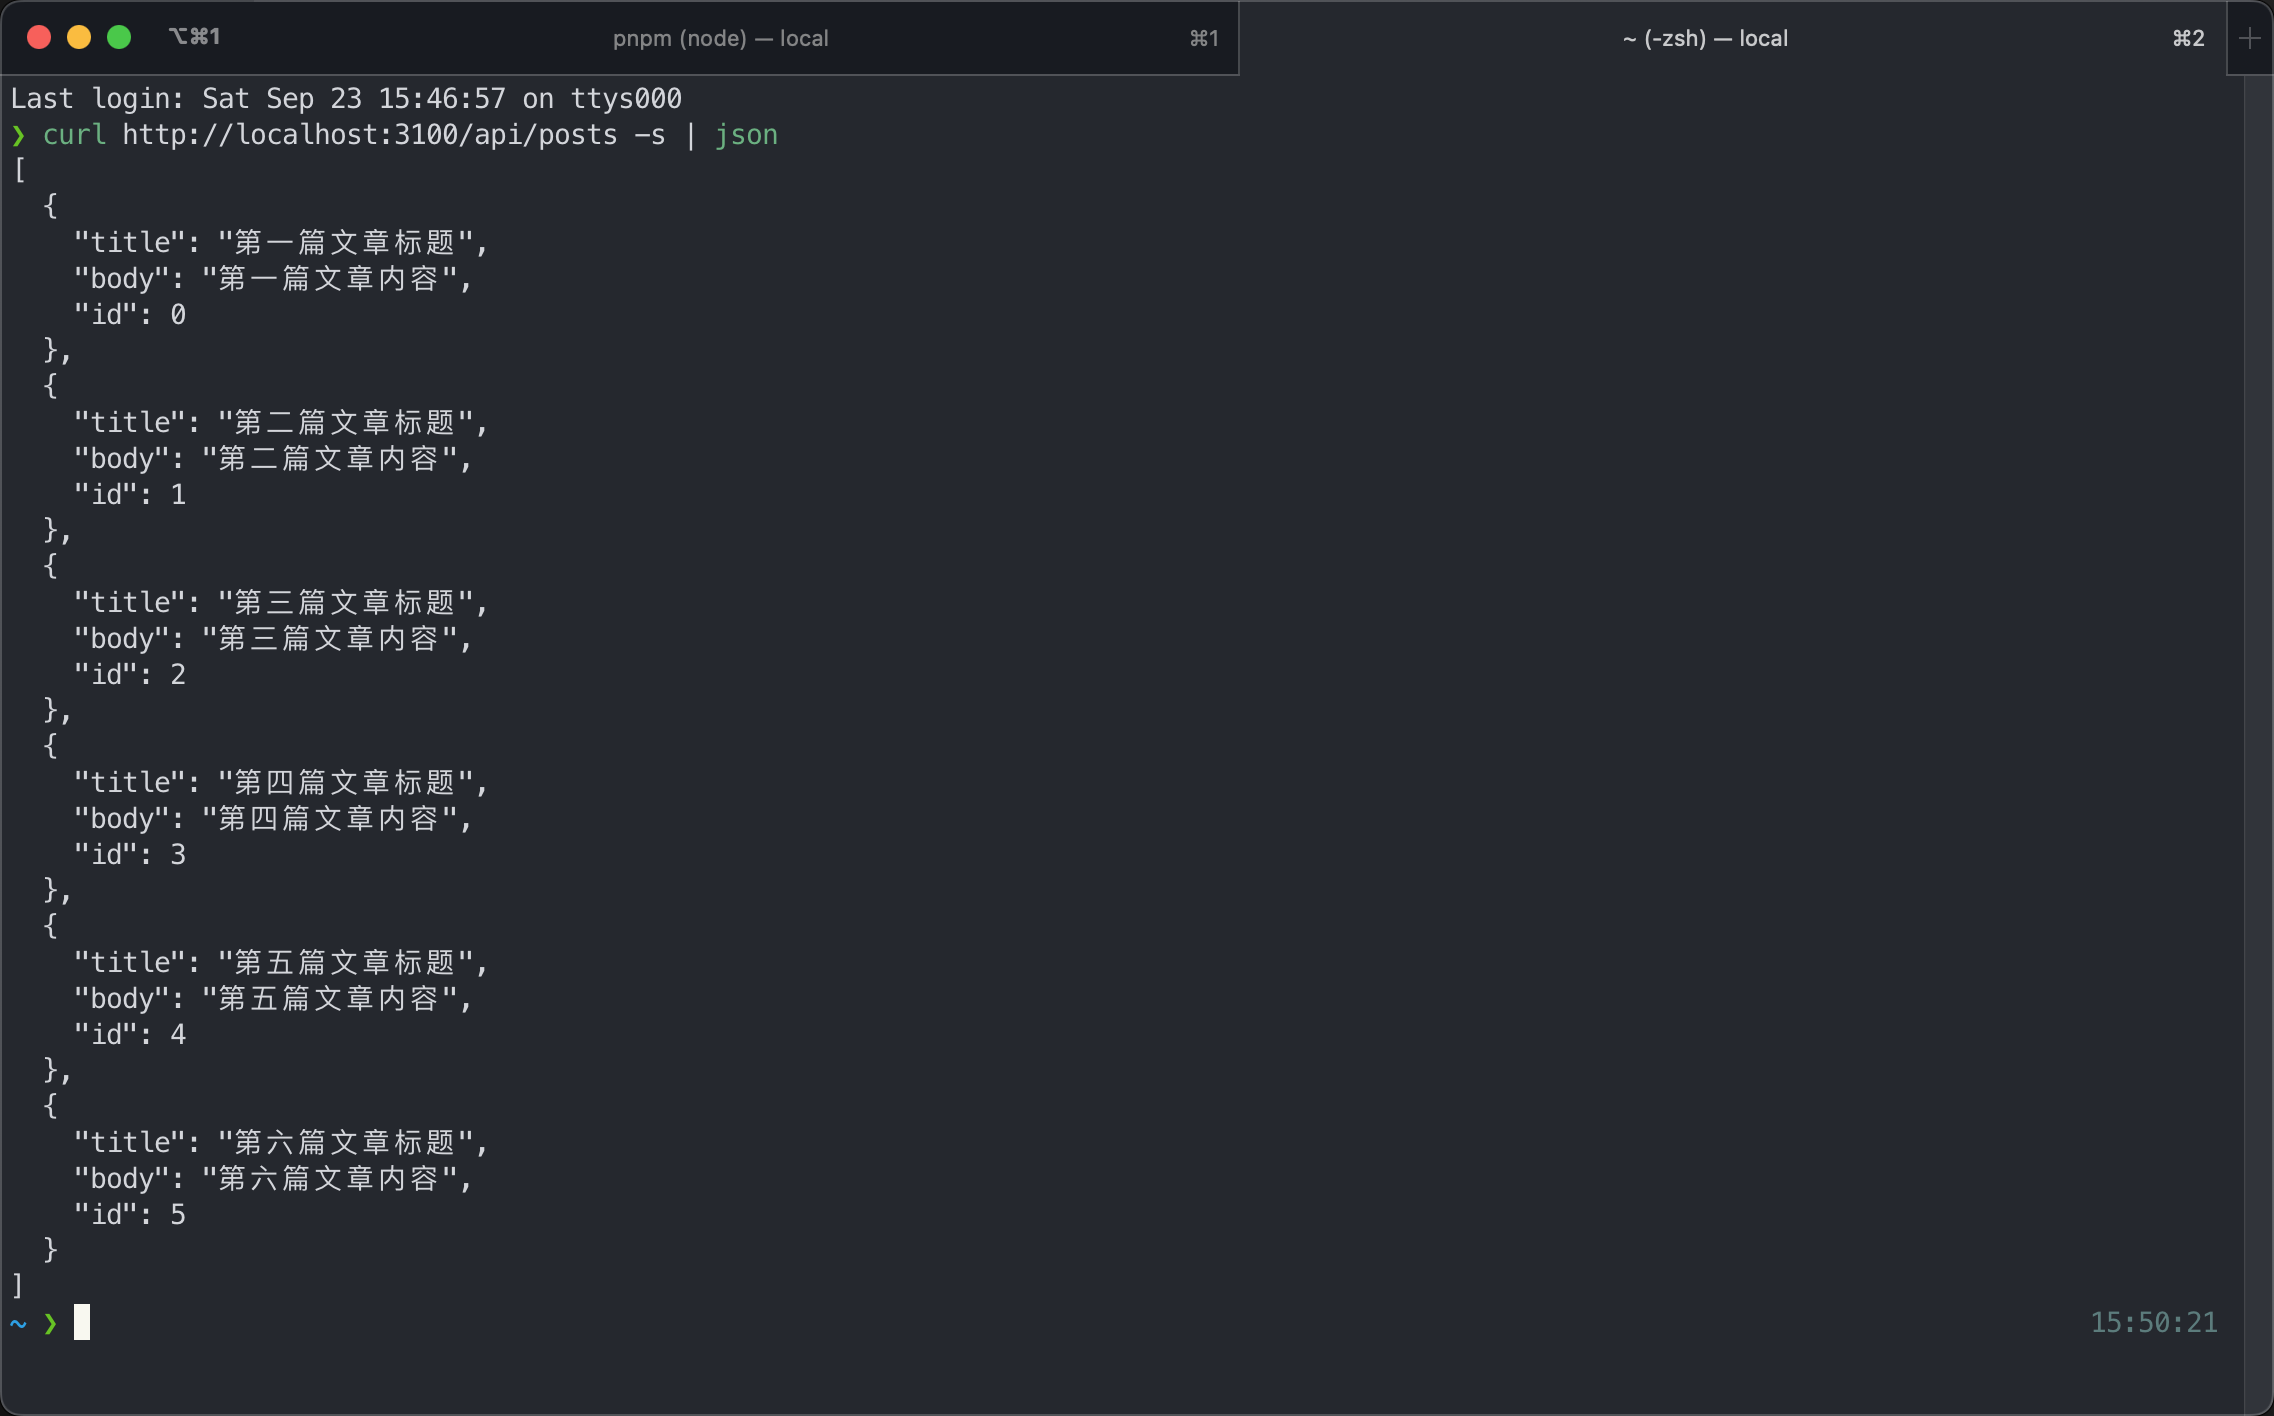 #### 查询单条数据[](#查询单条数据 "查询单条数据的直接链接") ``` curl http://localhost:3100/api/posts/1 -s | json ```  #### 添加数据[](#添加数据 "添加数据的直接链接") ``` curl -H "Content-Type: application/json" -X POST -d '{ "title": "文章7", "body": "第七篇文章" }' http://localhost:3100/api/posts -s | json ``` 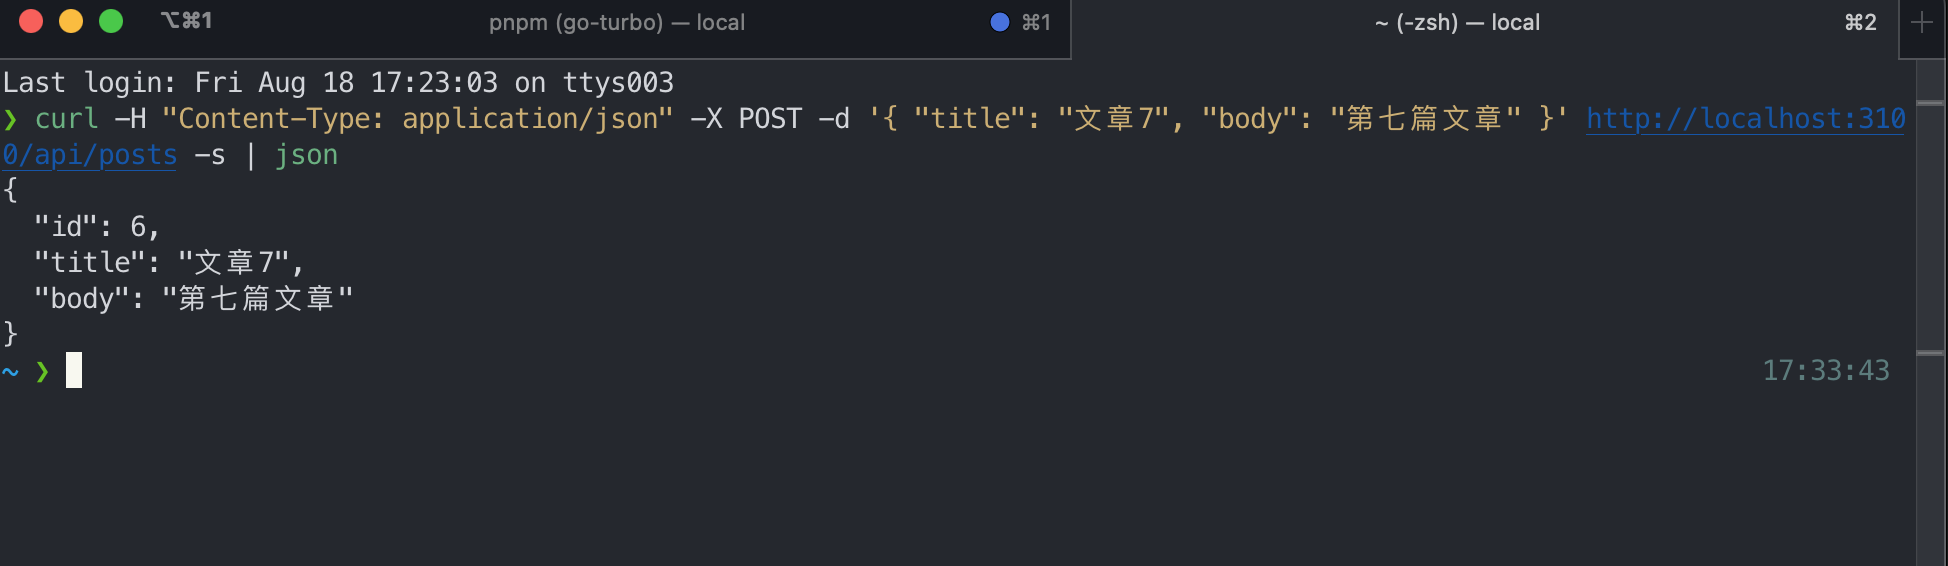 我们在查询一下所有文章,可以看到已经添加进去了 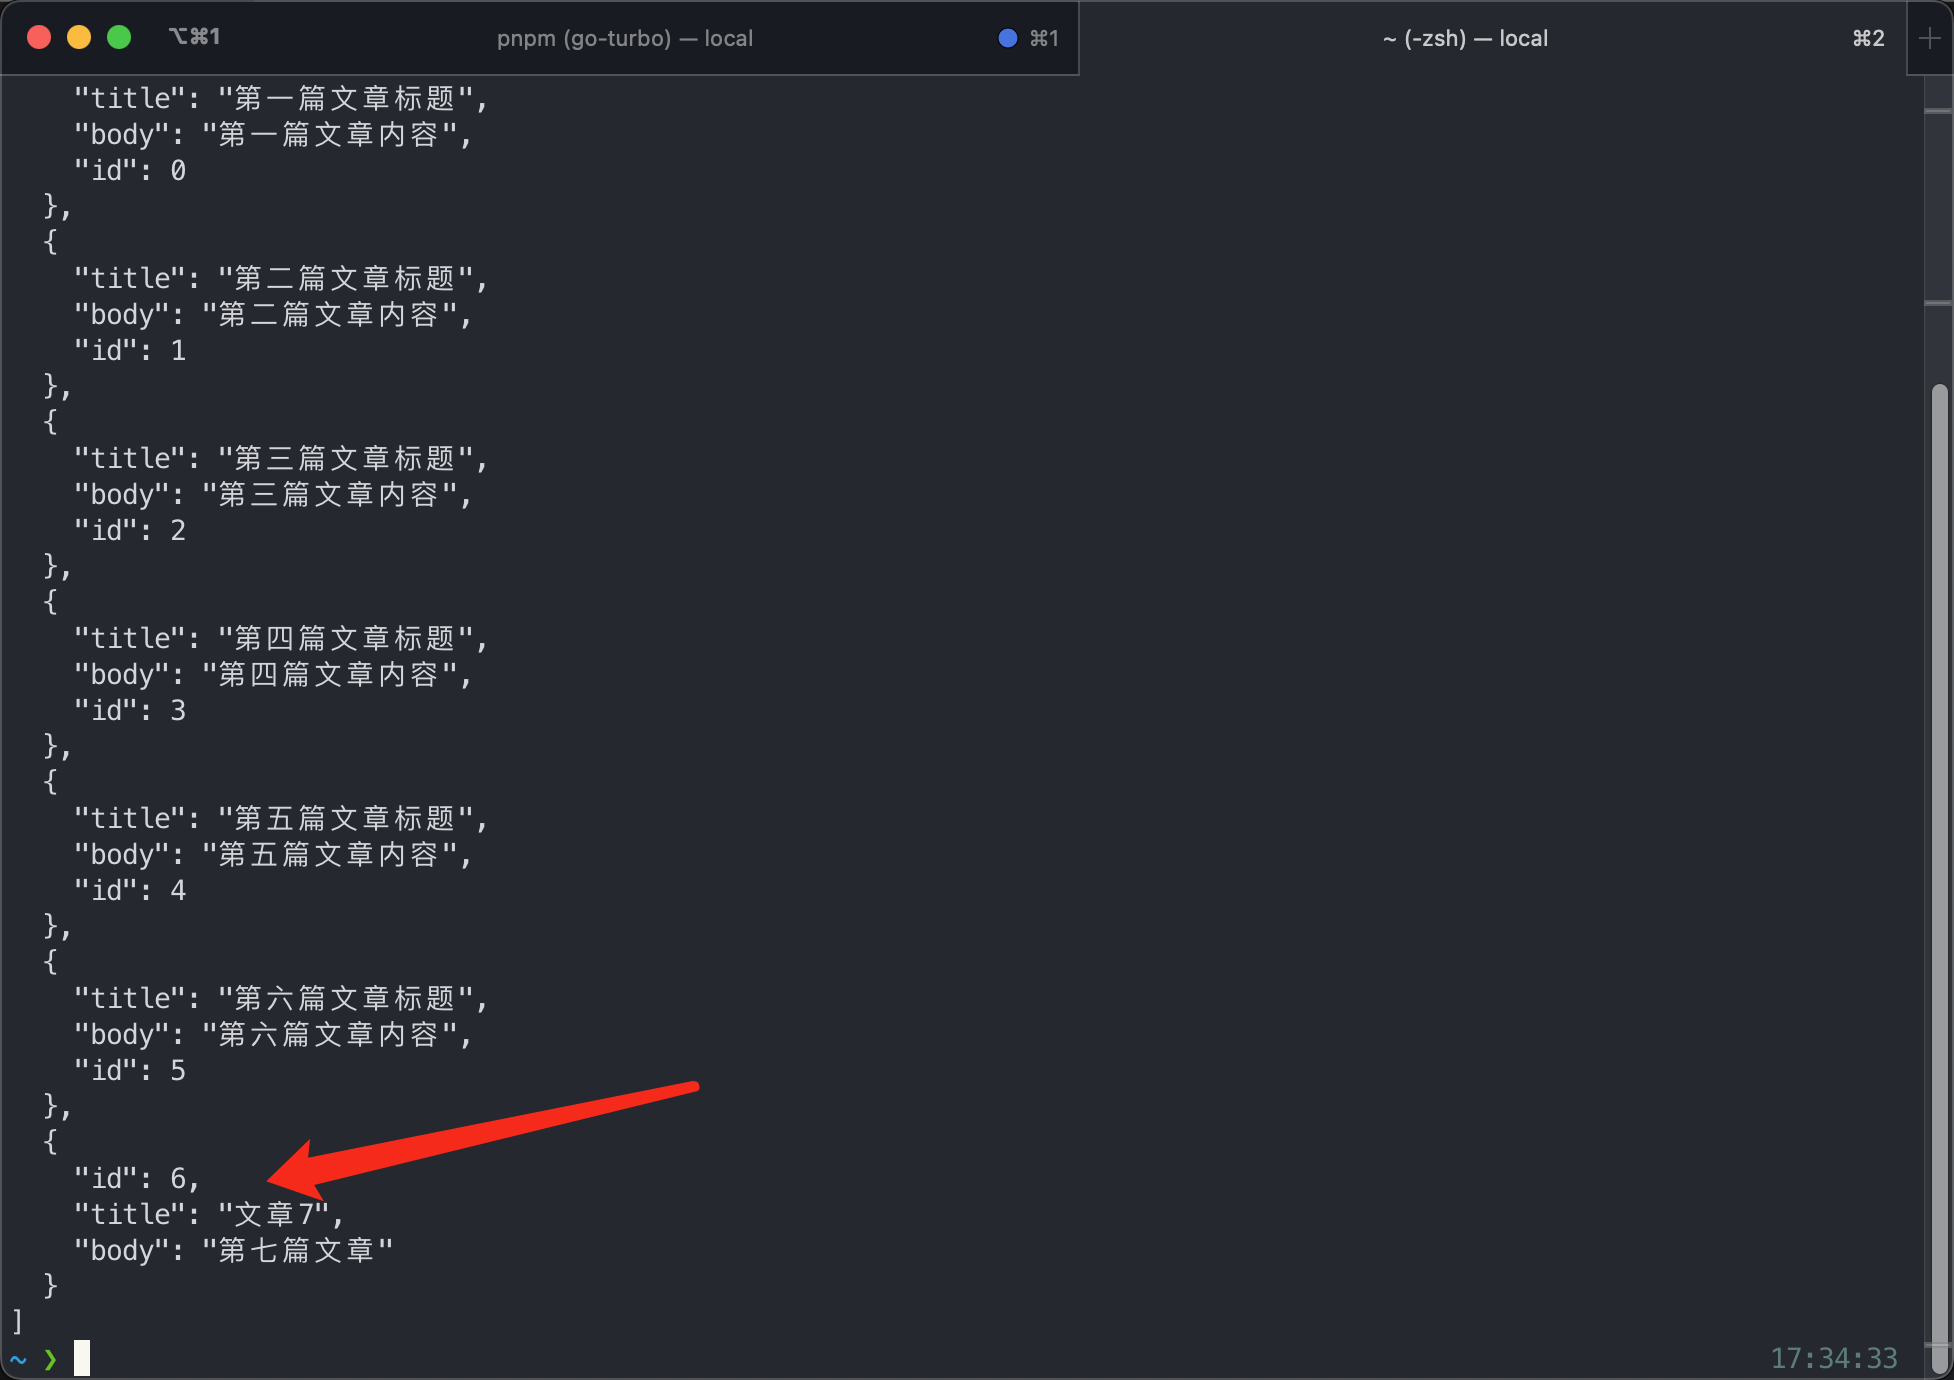 #### 更新数据[](#更新数据 "更新数据的直接链接") ``` curl -H "Content-Type: application/json" -X PATCH -d '{ "id": 6, "body": "第七篇文章已修改" }' http://localhost:3100/api/posts -s | json ``` 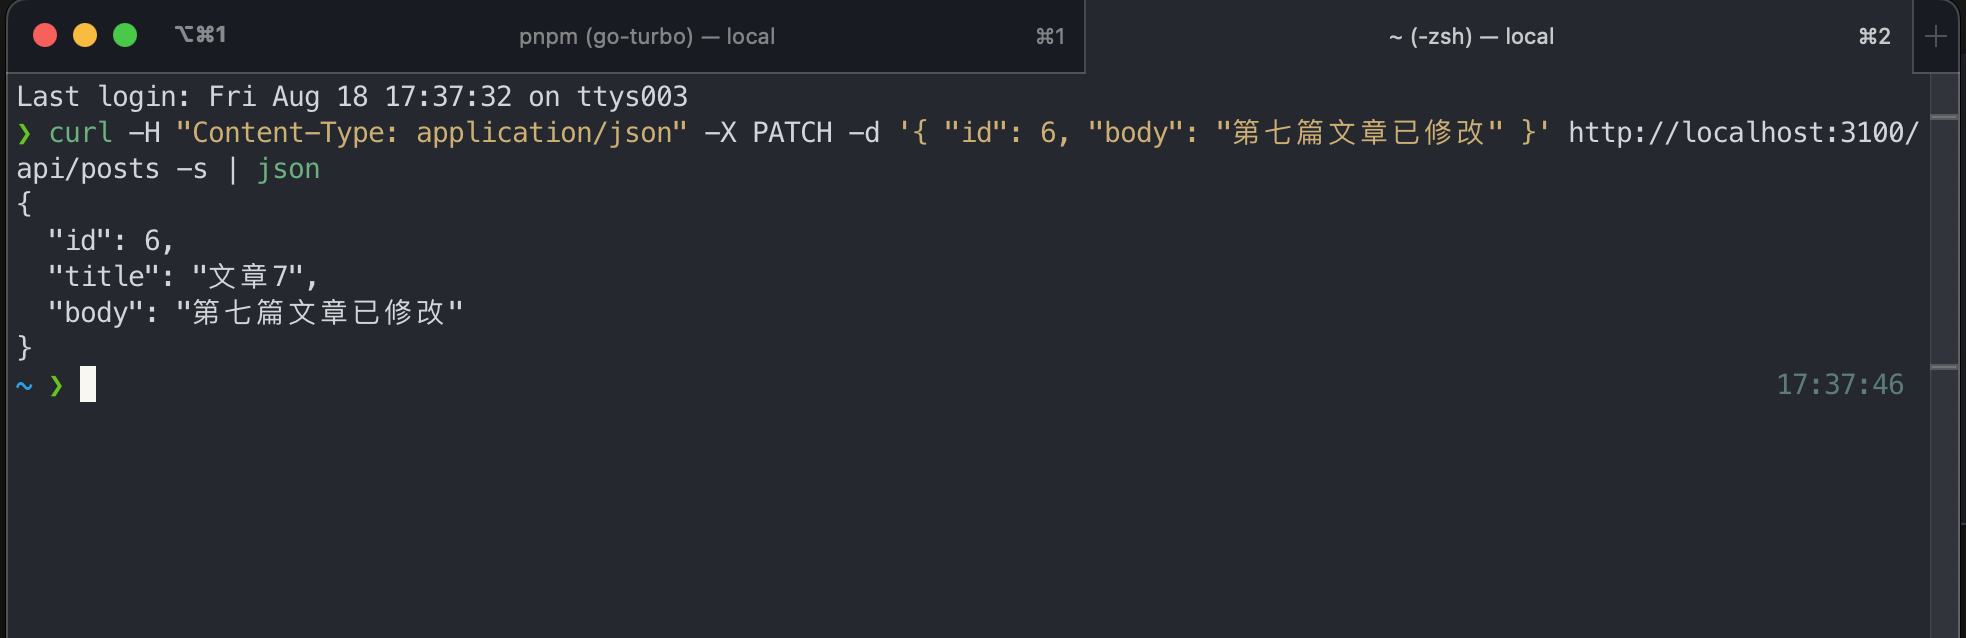 再去查询该篇文章的数据发现已经更改 ``` curl http://localhost:3100/api/posts/6 -s | json ```  #### 删除数据[](#删除数据 "删除数据的直接链接") ``` curl -H "Content-Type: application/json" -X DELETE http://localhost:3100/api/posts/6 -s | json ```  查询所有数据,发现已经删除 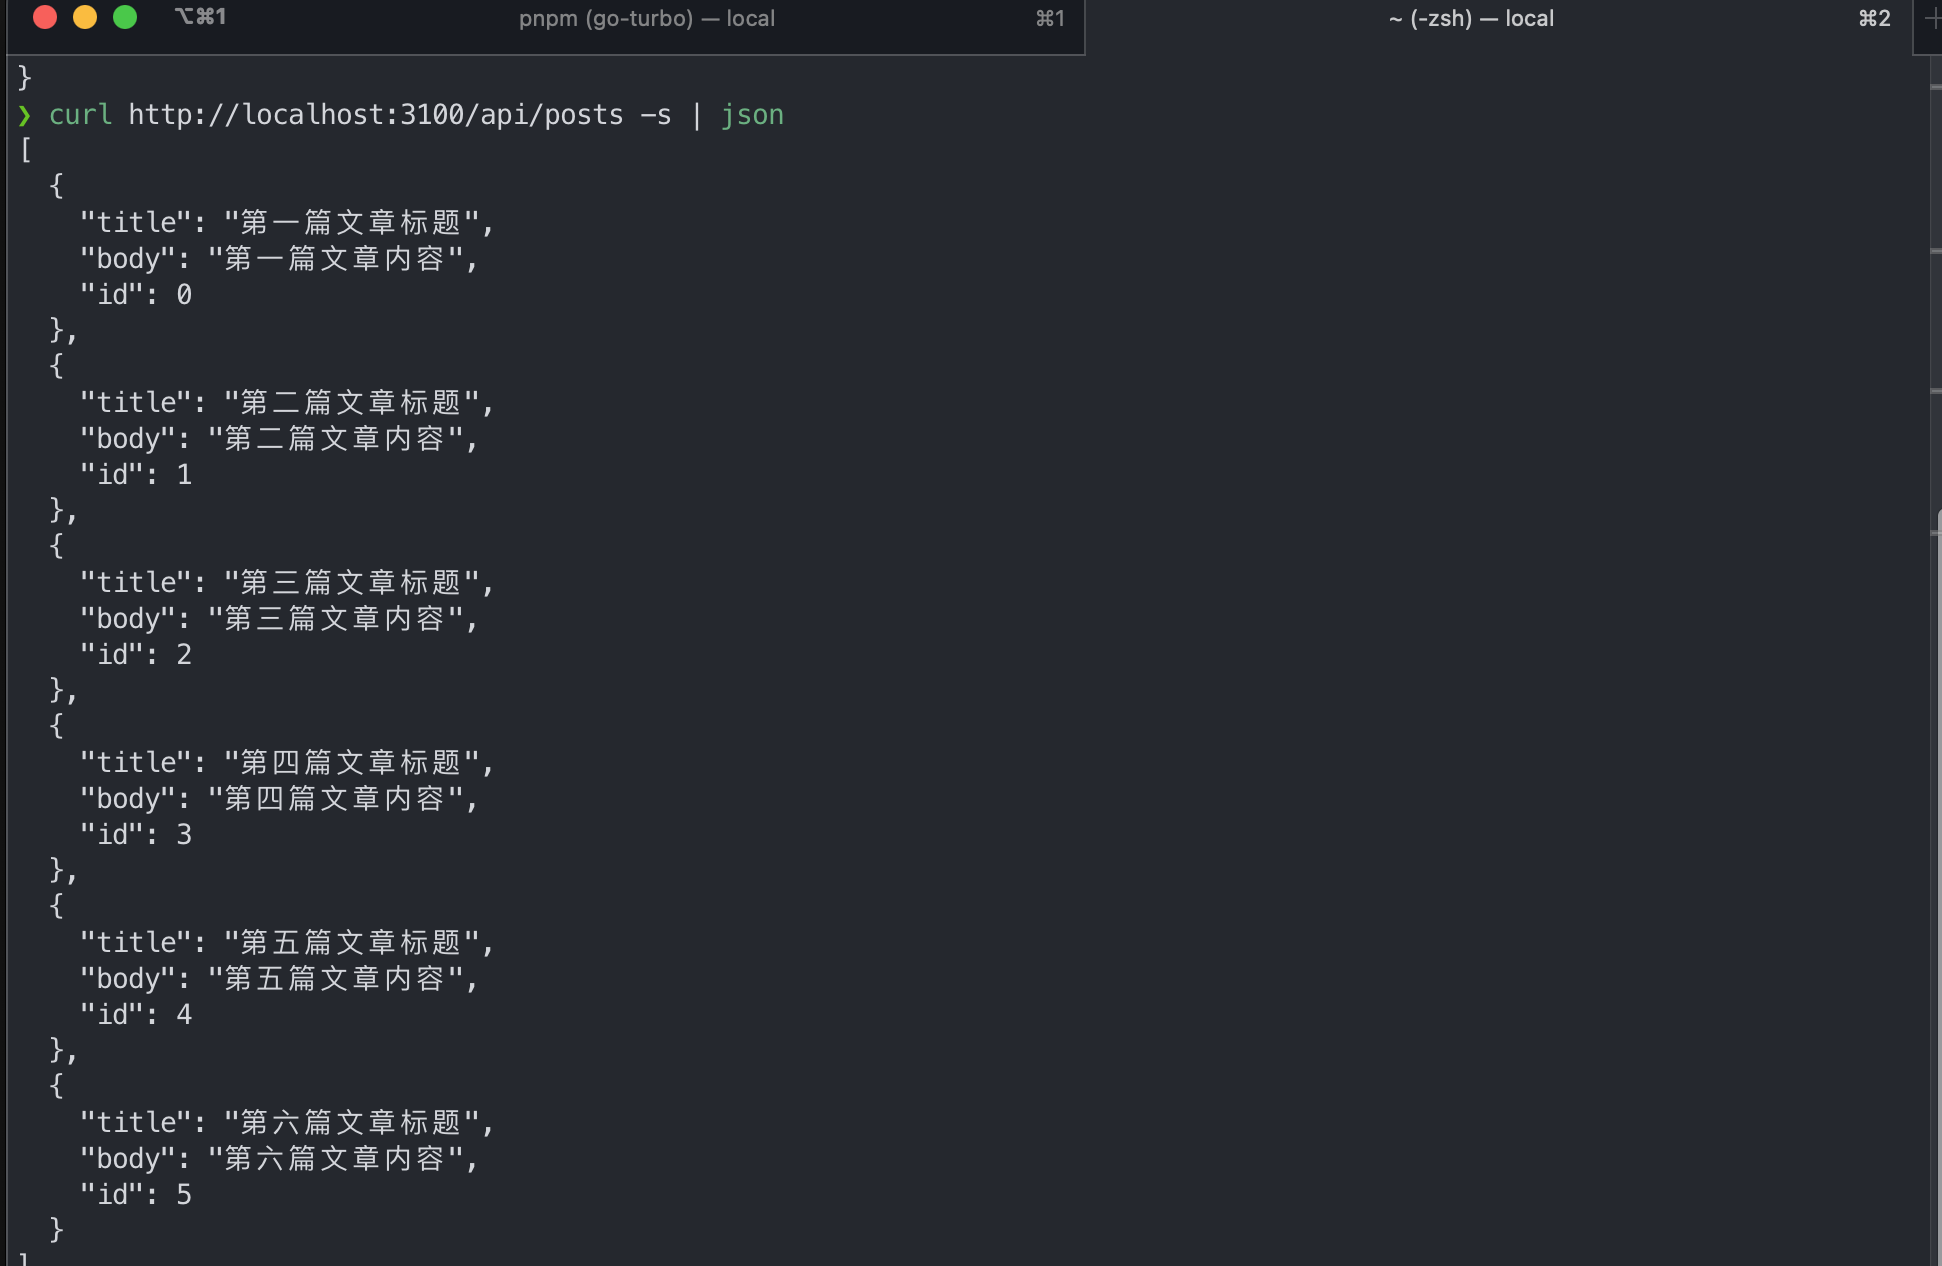 ### DTO与数据验证[](#dto与数据验证 "DTO与数据验证的直接链接") dto是用于对请求数据结构进行定义的一个类,用于aop编程。常用于对`body`,`query`等请求数据进行验证 我们常用的验证库为`class-validator` 对于`body`和`query`数据的验证一般使用dto+`ValidationPipe`这个预定义管道(本节下面的内容会自定义一个全局管道代替这个预定义管道) 对于`param`数据的验证一般直接使用预定义或者自定义的非全局管道,比如`ParseUUIDPipe` #### 数据创建验证[](#数据创建验证 "数据创建验证的直接链接") 我们先创建一个`CreatePostDto`用于创建文章的`body`数据验证 ``` // src/modules/content/dtos/create-post.dto.tsimport { Injectable } from '@nestjs/common';import { MaxLength, IsNotEmpty, IsOptional } from 'class-validator';@Injectable()export class CreatePostDto { @MaxLength(255, { always: true, message: '帖子标题长度最大为$constraint1', }) @IsNotEmpty({ groups: ['create'], message: '帖子标题必须填写' }) @IsOptional({ groups: ['update'] }) title: string; @IsNotEmpty({ groups: ['create'], message: '帖子内容必须填写' }) @IsOptional({ groups: ['update'] }) body: string; @MaxLength(500, { always: true, message: '帖子描述长度最大为$constraint1', }) @IsOptional({ always: true }) summary?: string;} ``` #### 数据更新验证[](#数据更新验证 "数据更新验证的直接链接") 然后再添加一个`UpdatePostDto`,用于对更新文章的`body`数据的验证 信息 `PartialType`用于把继承的父类中的所有属性在子类中变成可选 ``` // src/modules/content/dtos/update-post.dto.tsimport { Injectable } from '@nestjs/common';import { PartialType } from '@nestjs/swagger';import { IsDefined, IsNumber } from 'class-validator';import { CreatePostDto } from './create-post.dto';@Injectable()export class UpdatePostDto extends PartialType(CreatePostDto) { @IsNumber(undefined, { groups: ['update'], message: '帖子ID格式错误' }) @IsDefined({ groups: ['update'], message: '帖子ID必须指定' }) id: number;} ``` #### 使用验证DTO[](#使用验证dto "使用验证DTO的直接链接") 修改`PostController`,使用DTO进行数据验证 信息 "ParseIntPipe"这个管道用于对提交的数据进行整型转译,因为我们在url中输入的字符传入都后端必定为字符串,比如"/xxx/1",而此示例中的id均为整型,故使用此管道 ``` // src/modules/content/controllers/post.controller.tsimport { CreatePostDto } from '../dtos/create-post.dto';import { UpdatePostDto } from '../dtos/update-post.dto';@Controller('posts')export class PostController { //... @Post() async store( @Body( new ValidationPipe({ transform: true, forbidNonWhitelisted: true, forbidUnknownValues: true, validationError: { target: false }, groups: ['create'], }), ) data: CreatePostDto, ) { const newPost: PostEntity = { id: Math.max(...posts.map(({ id }) => id + 1)), ...data, }; posts.push(newPost); return posts; } @Patch() async update( @Body( new ValidationPipe({ transform: true, forbidNonWhitelisted: true, forbidUnknownValues: true, validationError: { target: false }, groups: ['update'], }), ) { id, ...data }: UpdatePostDto, ) { let toUpdate = posts.find((item) => item.id === Number(id)); if (isNil(toUpdate)) throw new NotFoundException(`the post with id ${id} not exits!`); toUpdate = { ...toUpdate, ...data }; posts = posts.map((item) => (item.id === Number(id) ? toUpdate : item)); return toUpdate; }} ``` #### 测试验证效果[](#测试验证效果 "测试验证效果的直接链接") 我们把更新数据时的`id`改成字符串,在更新数据时会捕获以下错误 ``` curl -H "Content-Type: application/json" -X PATCH -d '{ "id": "7", "body": "第七篇文章已修改" }' http://localhost:3100/api/posts -s | json ```  通俗的来讲,提供者就是通过**类型提示**或者**标识符**的方式使某个类或函数以依赖注入的方式在其它需要使用到它的地方进行实例化 同时也是Nestjs,Laravel,Symfony以及Spring,Angular等现代web框架的核心所在 ### 基本用法[](#基本用法 "基本用法的直接链接") 在nestjs中如果要使一个类变成提供者,需要在其顶部添加`@Injectale()`装饰器 以一个服务类为例 #### 执行命令[](#执行命令 "执行命令的直接链接") 执行以下命令来生成一个提供者,**但初学者建议手动创建文件** ``` nest g pr modules/content/services/post.service --no-spec --flat ``` #### 示例代码[](#示例代码 "示例代码的直接链接") **提供者类** 此处以一个文章的CRUD数据操作的服务类为示例 ``` // src/modules/content/services/post.service.ts@Injectable()export class PostService { protected posts: PostEntity[] = [ { title: '第一篇文章标题', body: '第一篇文章内容' }, { title: '第二篇文章标题', body: '第二篇文章内容' }, { title: '第三篇文章标题', body: '第三篇文章内容' }, { title: '第四篇文章标题', body: '第四篇文章内容' }, { title: '第五篇文章标题', body: '第五篇文章内容' }, { title: '第六篇文章标题', body: '第六篇文章内容' }, ].map((v, id) => ({ ...v, id })); async findAll() { return this.posts; } async findOne(id: number) { const post = this.posts.find((item) => item.id === id); if (isNil(post)) throw new NotFoundException(`the post with id ${id} not exits!`); return post; } async create(data: CreatePostDto) { const newPost: PostEntity = { id: Math.max(...this.posts.map(({ id }) => id + 1)), ...data, }; this.posts.push(newPost); return newPost; } async update(data: UpdatePostDto) { let toUpdate = this.posts.find((item) => item.id === data.id); if (isNil(toUpdate)) throw new NotFoundException(`the post with id ${data.id} not exits!`); toUpdate = { ...toUpdate, ...data }; this.posts = this.posts.map((item) => (item.id === data.id ? toUpdate : item)); return toUpdate; } async delete(id: number) { const toDelete = this.posts.find((item) => item.id === id); if (isNil(toDelete)) throw new NotFoundException(`the post with id ${id} not exits!`); this.posts = this.posts.filter((item) => item.id !== id); return toDelete; }} ``` **注册提供者** 创建完提供者后应把提供者类放到模块的`providers`数组中以注册 信息 如果服务类是使用命令创建的,这里的注册会自动添加 ``` // src/modules/content/content.module.ts@Module({ controllers: [PostController], providers: [PostService],})export class ContentModule {} ``` **使用提供者** 现在可以在控制器中通过依赖注入的方式使用该服务了,比如通过`constructor`注入 ``` // src/modules/content/controllers/post.controller.ts@Controller('posts')export class PostController { constructor(private postService: PostService) {} @Get() async index() { return this.postService.findAll(); } @Get(':id') async show(@Param('id', new ParseIntPipe()) id: number) { return this.postService.findOne(id); } @Post() async store( @Body( new ValidationPipe({ transform: true, forbidUnknownValues: true, validationError: { target: false }, groups: ['create'], }), ) data: CreatePostDto, ) { return this.postService.create(data); } @Patch() async update( @Body( new ValidationPipe({ transform: true, forbidUnknownValues: true, validationError: { target: false }, groups: ['update'], }), ) data: UpdatePostDto, ) { return this.postService.update(data); } @Delete(':id') async delete(@Param('id', new ParseIntPipe()) id: number) { return this.postService.delete(id); }} ``` ### 注册与导出[](#注册与导出 "注册与导出的直接链接") 提供者需要在模块元元素的`providers`中注册才可以被本模块的其它类注入,需要在`exports`中导出后才能被其它模块调用 ``` // src/modules/content/content.module.ts@Module({ controllers: [PostController], providers: [PostService], exports: [PostService],})export class ContentModule {} ``` ### 自定义提供者[](#自定义提供者 "自定义提供者的直接链接") 上面介绍的`PostService`是标准的提供者,下面来看一下各种各种样的提供者 - 值提供者: 使用`useValue`来构建一个提供者 - 字符串提供者: 使用字符串,比如`CONNECT`来构建一个提供者 - 类映射提供者: 使用一个类映射另一个类来构建一个提供者 - 构造器提供者: 使用`factory`来构建一个提供者 - 别名提供者: 使用`useExisting`来为一个提供者指定一个别名 - 异步提供者: 使用`async`关键字+`factory`构建异步提供者 接下来我们来看一下这几种自定义的提供者的示例 #### 创建[](#创建 "创建的直接链接") 首先,创建一个示例模块`ExampleModule` ``` nest g mo modules/example ``` 分别创建几个提供者 ``` nest g pr modules/example/services/first.service --no-spec --flatnest g pr modules/example/services/second.service --no-spec --flatnest g pr modules/example/services/third.service --no-spec --flatnest g pr modules/example/services/fourth.service --no-spec --flatnest g pr modules/example/services/fifth.service --no-spec --flatnest g pr modules/example/services/sixth.service --no-spec --flat ``` #### 编写[](#编写 "编写的直接链接") 编写一下这几个提供者 ``` // src/modules/example/services/first.service.ts@Injectable()export class FirstService { useValue() { return ''; } useId() { return '字符串提供者'; } useAlias() { return '别名提供者'; }}// src/modules/example/services/second.service.ts@Injectable()export class SecondService { useClass() { return ''; } useFactory() { return '构造器提供者1'; } useAsync() { return '异步提供者'; }}// src/modules/example/services/third.service.ts@Injectable()export class ThirdService { useClass() { return ''; } useFactory() { return '构造器提供者2'; }}// src/modules/example/services/fourth.service.ts@Injectable()export class FourthService { constructor(private third: ThirdService) {} getContent() { return this.third.useFactory(); } async getPromise() { return new Promise((resovle) => { setTimeout(() => { resovle(this.third); }, 100); }); }} ``` #### 注册[](#注册 "注册的直接链接") 然后把这些提供者按不同的方式在`ExampleModule`中注册。如下代码,可以看到不同的提供者注册方式 ``` // src/modules/example/example.module.tsconst firstObject = { useValue: () => 'useValue提供者', useAlias: () => '别名提供者',};const firstInstance = new FirstService();@Module({ providers: [ { provide: FirstService, useValue: firstObject, }, { provide: 'ID-EXAMPLE', useValue: firstInstance, }, { provide: SecondService, useClass: ThirdService, }, { provide: 'FACTORY-EXAMPLE', useFactory(second: SecondService) { const factory = new FourthService(second); return factory; }, inject: [SecondService], }, { provide: 'ALIAS-EXAMPLE', useExisting: FirstService, }, { provide: 'ASYNC-EXAMPLE', useFactory: async () => { const factory = new FourthService(new SecondService()); return factory.getPromise(); }, }, ],})export class ExampleModule {} ``` #### 使用[](#使用 "使用的直接链接") 创建一个控制器,我们来看一下如何使用 ``` nest g co modules/example/controllers/test --no-spec --flat ``` 编写`TestController`,代码如下 ``` // src/modules/example/controllers/test.controller.ts@Controller('test')export class TestController { constructor( private first: FirstService, @Inject('ID-EXAMPLE') private idExp: FirstService, @Inject('FACTORY-EXAMPLE') private ftExp: FourthService, @Inject('ALIAS-EXAMPLE') private asExp: FirstService, @Inject('ASYNC-EXAMPLE') private acExp: SecondService, ) {} @Get('value') async useValue() { return this.first.useValue(); } @Get('id') async useId() { return this.idExp.useId(); } @Get('factory') async useFactory() { return this.ftExp.getContent(); } @Get('alias') async useAlias() { return this.asExp.useAlias(); } @Get('async') async useAsync() { return this.acExp.useAsync(); }} ``` #### 效果[](#效果 "效果的直接链接") 启动应用 ``` pnpm start:dev ``` 通过URL访问控制器中这些方法,看一下输出来体验不同点 ### 循环依赖[](#循环依赖 "循环依赖的直接链接") 如果两个提供者之间互相依赖,可以通过注入`forwardRef`来实现 #### 创建[](#创建-1 "创建的直接链接") 创建两个服务 ``` nest g pr modules/example/services/fifth.service --no-spec --flatnest g pr modules/example/services/sixth.service --no-spec --flat ``` #### 编写[](#编写-1 "编写的直接链接") 编写以下代码来使两个提供者之间相互循环注入 ``` // src/modules/example/services/fifth.service.ts@Injectable()export class FifthService { constructor( @Inject(forwardRef(() => SixthService)) protected sixth: WrapperType<SixthService>, ) {} circular() { return `循环依赖1${this.sixth.circular()}`; }}// src/modules/example/services/sixth.service.ts@Injectable()export class SixthService { constructor( @Inject(forwardRef(() => FifthService)) protected fifth: WrapperType<FifthService>, ) {} circular() { return `循环依赖2`; }} ``` #### 使用[](#使用-1 "使用的直接链接") 在控制器中添加方法,并访问URL来查看效果 ``` // src/modules/example/example.module.ts@Controller('test')export class TestController { constructor( private first: FirstService, @Inject('ID-EXAMPLE') private idExp: FirstService, @Inject('FACTORY-EXAMPLE') private ftExp: FourthService, @Inject('ALIAS-EXAMPLE') private asExp: FirstService, @Inject('ASYNC-EXAMPLE') private acExp: SecondService, private fifth: FifthService, ) {} // ... @Get('circular') async useCircular() { return this.fifth.circular(); }} ``` 同时模块间也可以循环依赖,例如 备注 下面代码仅展示用法,不要放到应用中 ``` @Module({ imports: [forwardRef(() => CatsModule)],})export class CommonModule {} ``` ### 注入范围[](#注入范围 "注入范围的直接链接") 在注入提供者时有多种方法 `DEFAULT`: 默认的单例注入,每次请求都是使用同一个实例 `REQUEST`: 每次请求创建一个新的提供者实例,并且该实例在这次请求内被所有调用者所共享,请求完毕自动销毁 `TRANSIENT`:每次被使用者注入该提供者时都会创建一个新的实例,但之后的请求所有注入者都只延用各自已创建的实例了 使用方法如下 ``` import { Injectable, Scope } from '@nestjs/common';@Injectable({ scope: Scope.REQUEST })export class CatsService {}// or{ provide: 'CACHE_MANAGER', useClass: CacheManager, scope: Scope.TRANSIENT,} ``` 创建两个提供者进行演示 #### 创建[](#创建-2 "创建的直接链接") ``` nest g pr modules/example/services/seventh.service --no-spec --flatnest g pr modules/example/services/eighth.service --no-spec --flat ``` #### 编写[](#编写-2 "编写的直接链接") 两个提供者类的代码如下 ``` // src/modules/example/services/seventh.service.ts@Injectable({ scope: Scope.REQUEST })export class SeventhService { protected demo = 0; async add() { this.demo++; } async find() { return this.demo; }}// src/modules/example/services/eighth.service.ts@Injectable()export class EighthService { constructor(protected seventh: SeventhService) {} async echo() { await this.seventh.add(); console.log(`in use service: ${await this.seventh.find()}`); }} ``` #### 使用[](#使用-2 "使用的直接链接") 在控制器中使用 ``` @Controller('test')export class TestController { constructor( // ... private seventh: SeventhService, private eighth: EighthService, ) {} // ... @Get('scope') async echoScope() { await this.eighth.echo(); await this.seventh.add(); console.log(`in controller: ${await this.seventh.find()}`); return 'Scope Test'; }} ``` #### 效果[](#效果-1 "效果的直接链接") 访问该接口来看一下效果 首先,我们在`REQUEST`模式下看一下效果 ``` // src/modules/example/services/seventh.service.ts@Injectable({ scope: Scope.REQUEST })export class SeventhService { // ...} ``` 访问[http://localhost:3100/api/test/scope](http://localhost:3100/api/test/scope),可以看到,无论刷新页面多少次,每次输出都如下图 这意味着 - 每一次访问`EighthService`和`TestController`是共享一个`SeventhService`提供者的实例的 - 每一次访问都会重置`SeventhService`提供者的实例 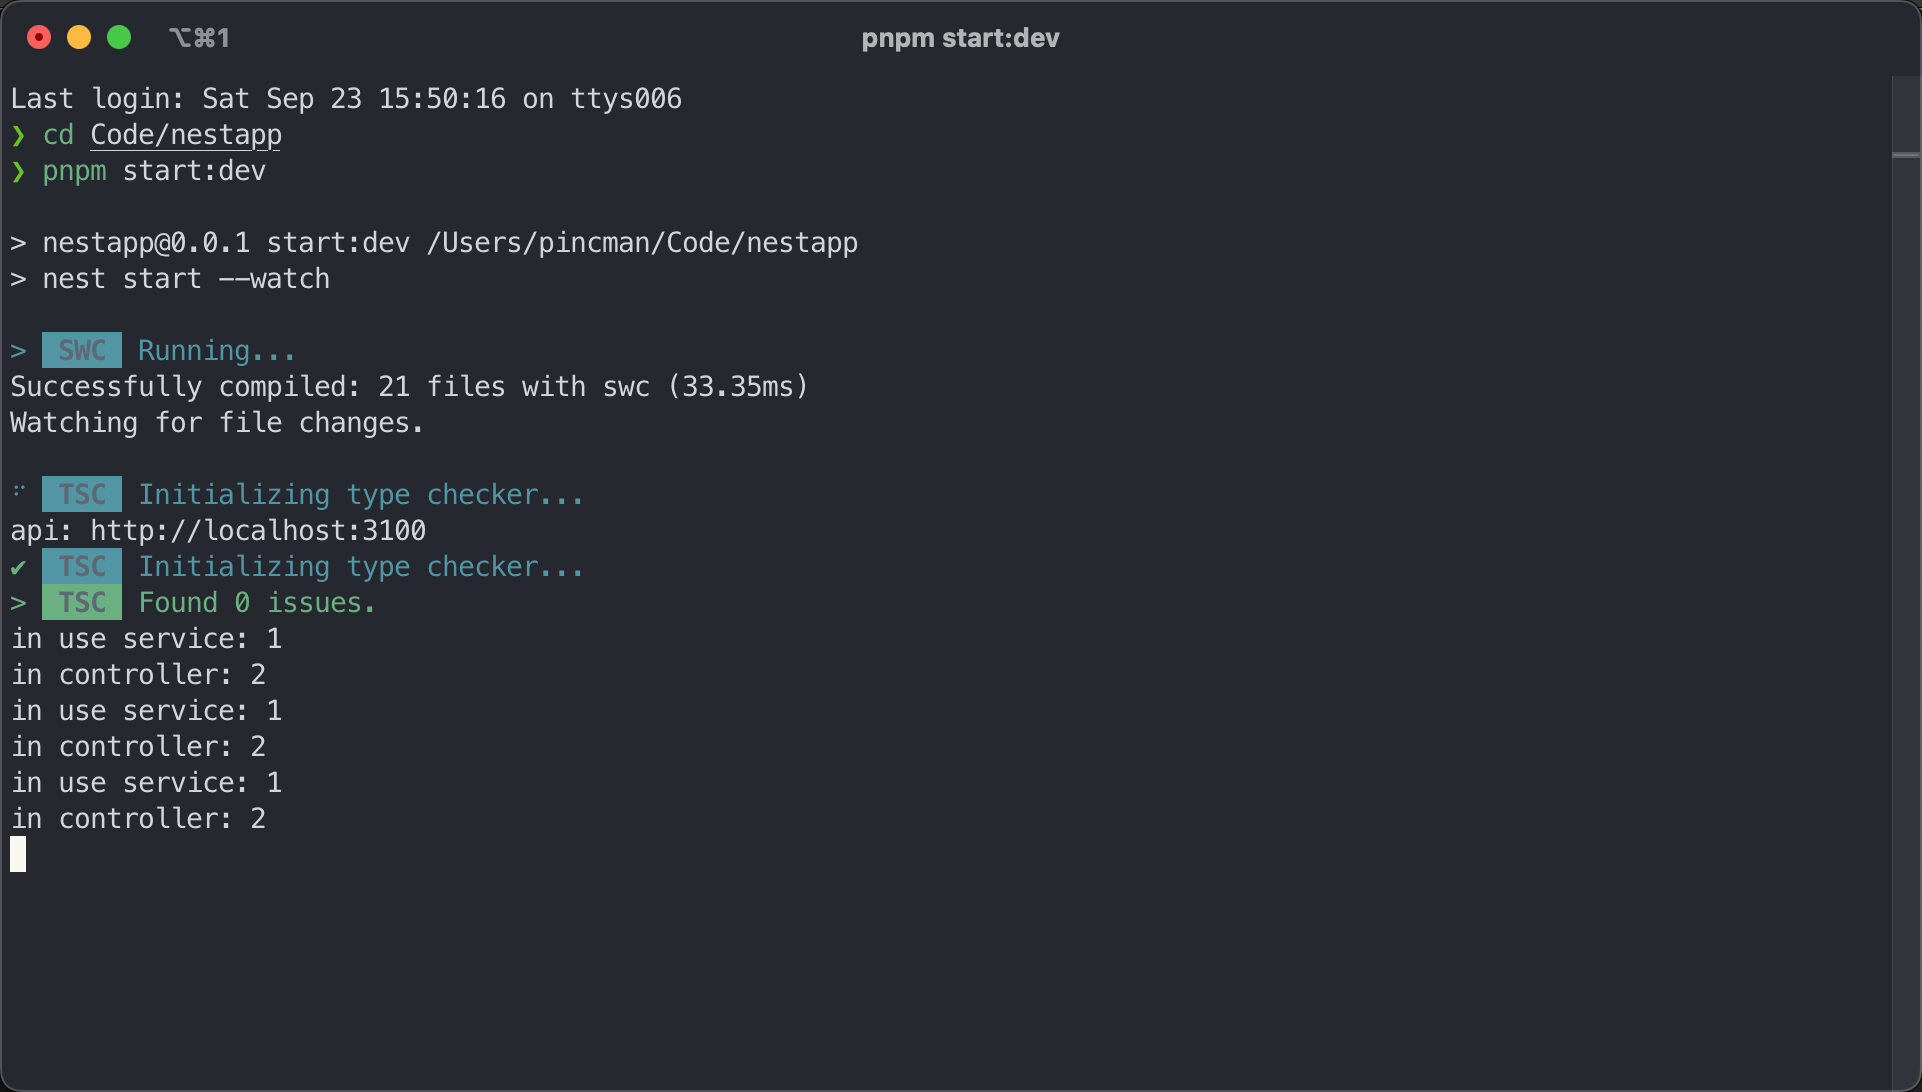 接下来,我们看一下`TRANSIENT`下的效果 ``` // src/modules/example/services/seventh.service.ts@Injectable({ scope: Scope.TRANSIENT })export class SeventhService { //...} ``` 如下图,可以看到 - `FifthService`和`TestController`并不会共享`SeventhService`提供者的实例,它们会各自创建一个新实例 - 但每次访问`FifthService`和`TestController`他两都不会再去给各自创建一个新实例,而是一直沿用在第一次访问时他们各自创建的那个实例 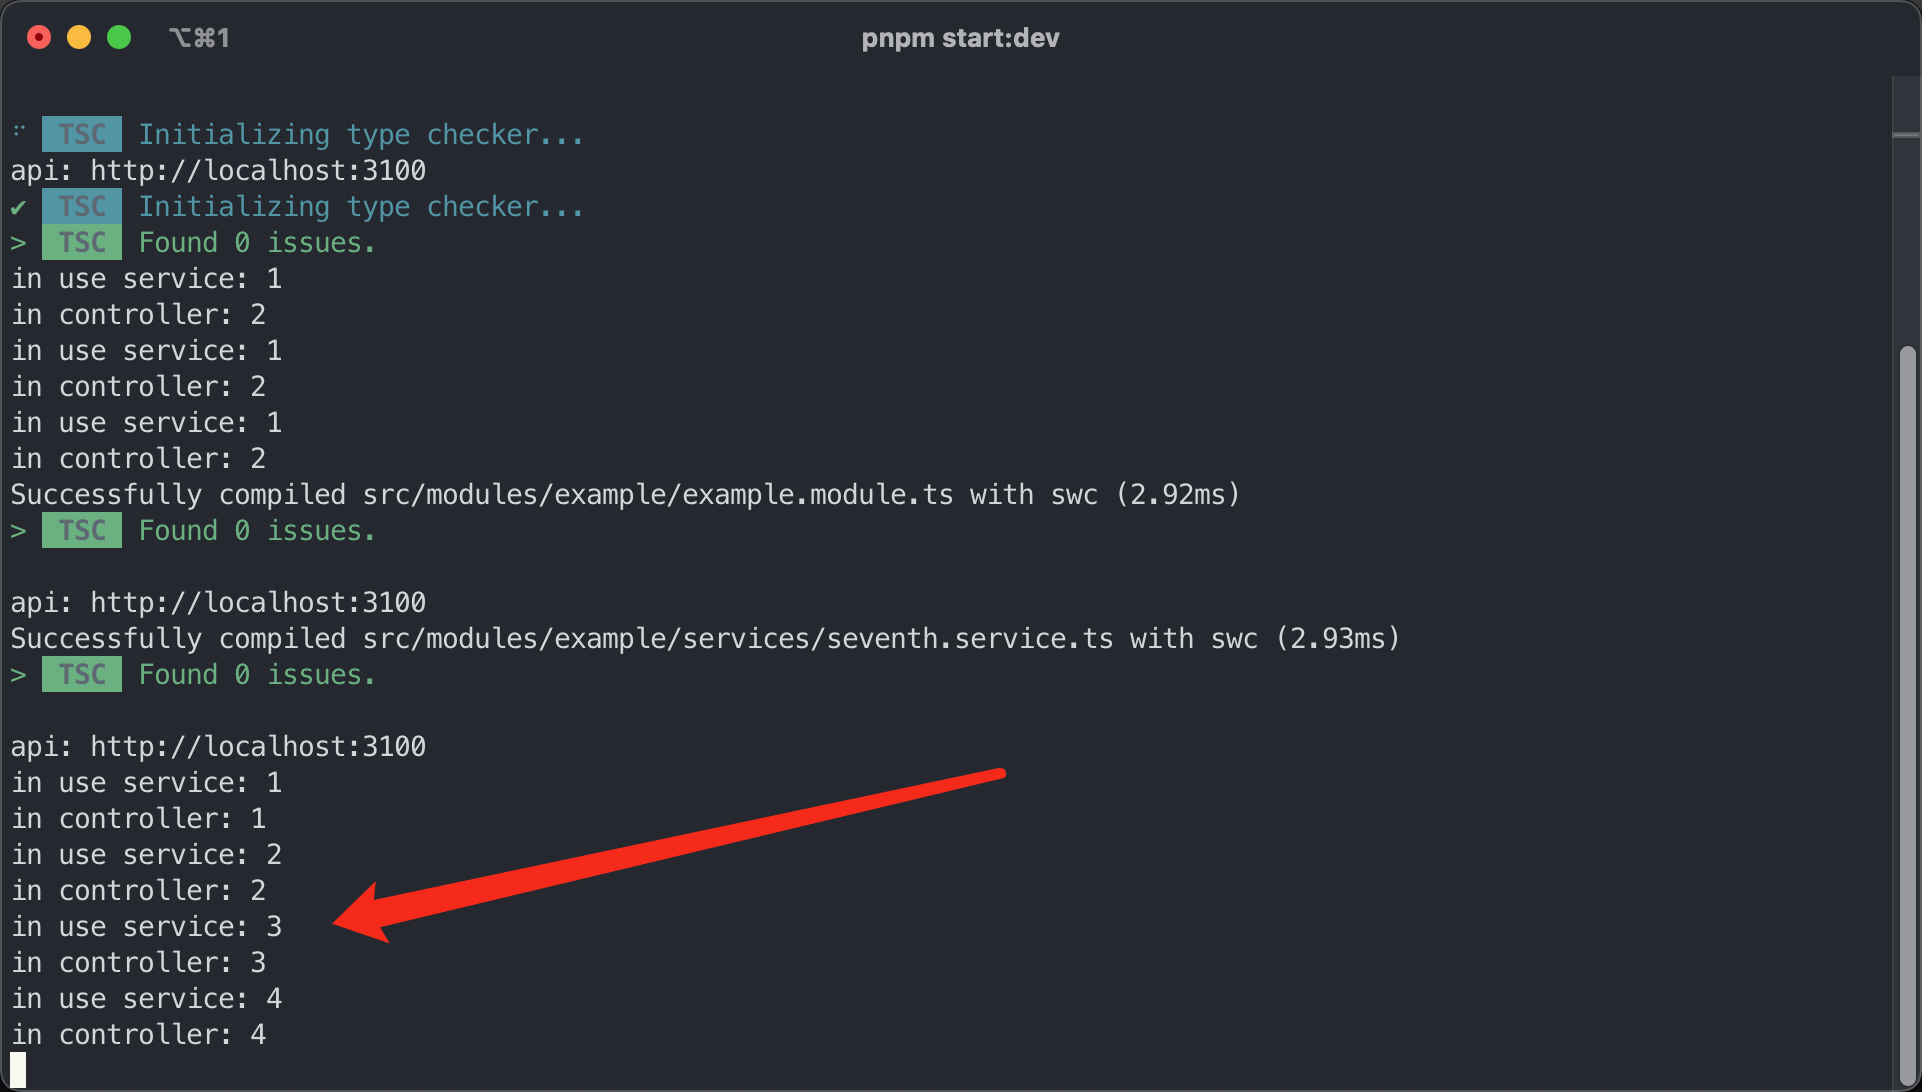 最后,我们来看一下正常模式(也就是不设置请求范围)下的效果 ``` // src/modules/example/services/seventh.service.ts@Injectable()export class SeventhService { ...} ``` 如图,可以看到 - 每次请求,`FifthService`和`TestController`都共享一个`SeventhService`提供者的实例 - 每次请求,`SeventhService`提供者的实例都是第一次创建的实例 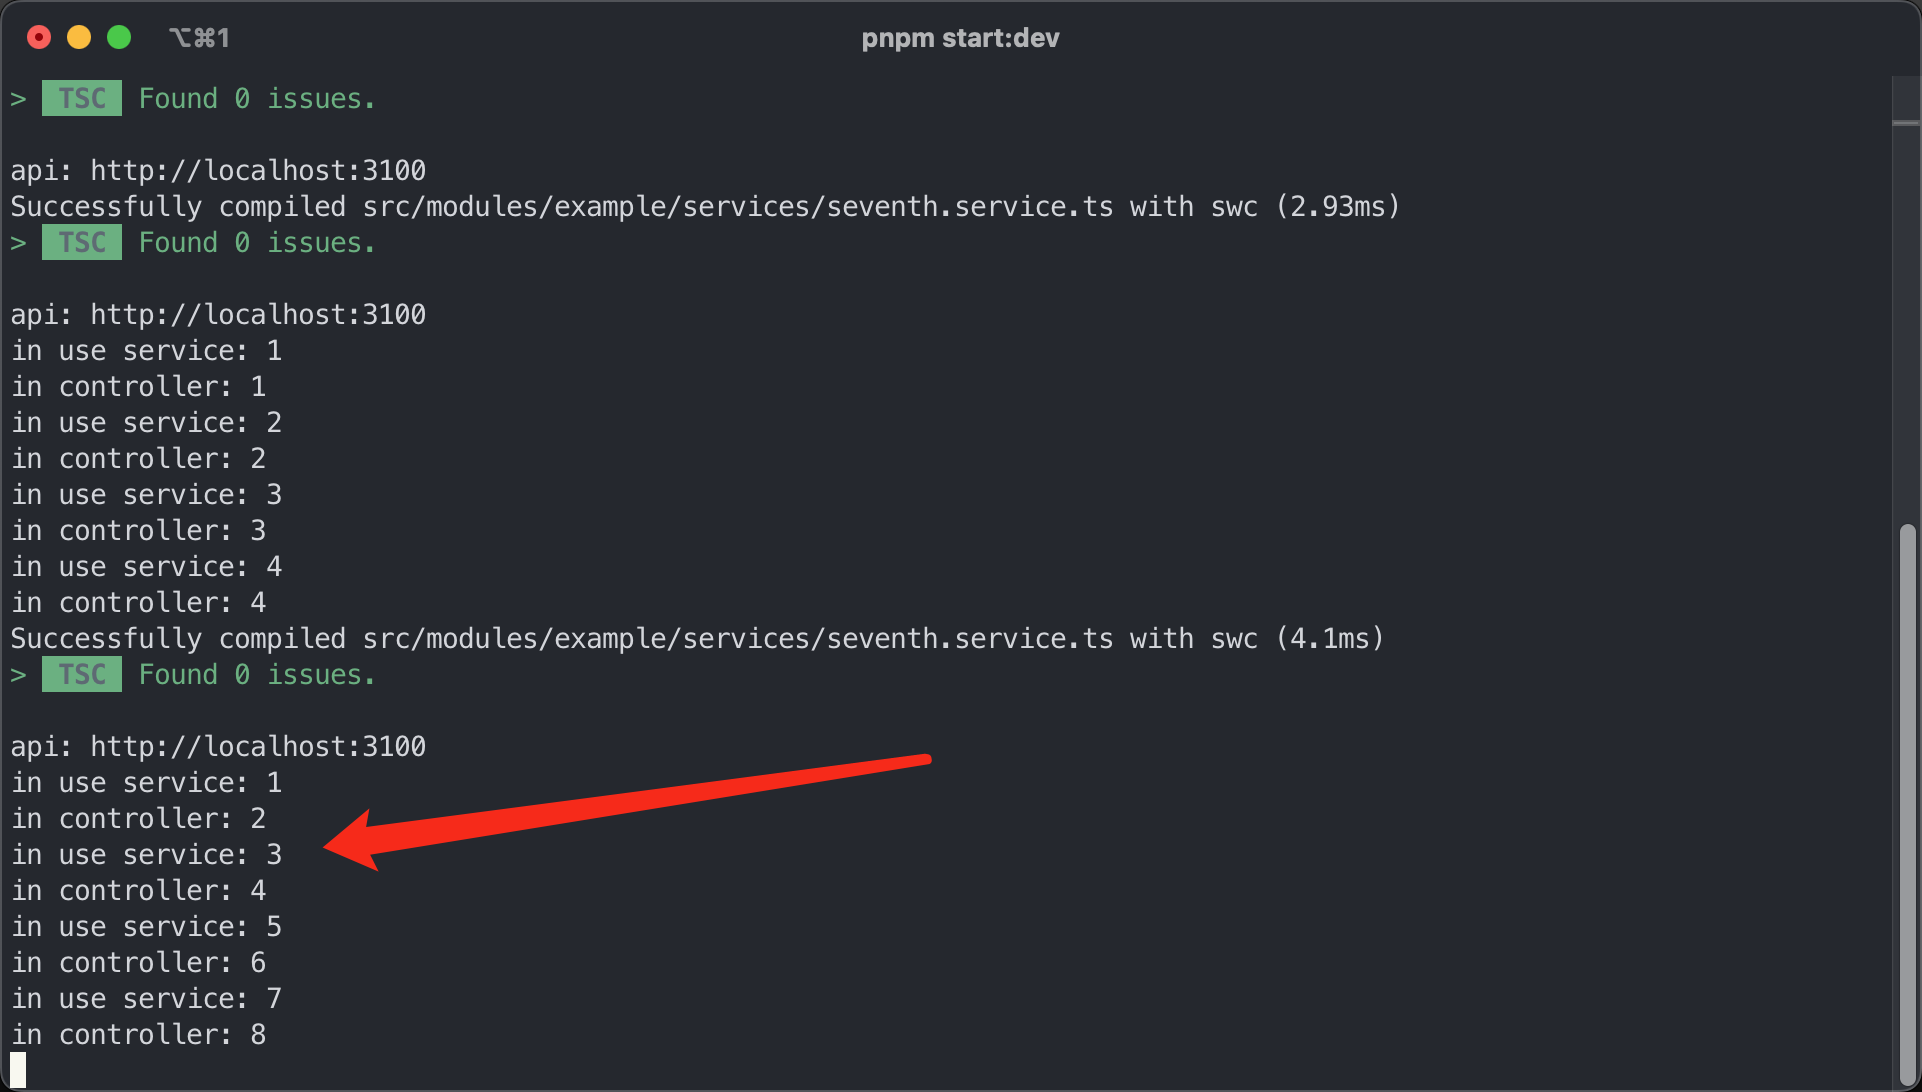 模块是一个功能的集合,比如`user`,`forum`等,包含了各自控制器,服务等等 ### 共享模块[](#共享模块 "共享模块的直接链接") 上面的`ExampleModule`如果要调用`ContentModule`模块的某个提供者,必须先在`ContentModule`中使用`exports`导出该提供者,然后在`ExampleModule`模块中使用`imports`导入 ``` // src/modules/content/content.module.ts@Module({ controllers: [PostController], providers: [PostService], exports: [PostService],})export class ContentModule {}// src/modules/example/example.module.tsimport { ContentModule } from '../content/content.module';@Module({ imports: [ContentModule], // ... controllers: [TestController],})export class ExampleModule {} ``` 然后就可以在`ExampleModule`的控制器,提供者等类中注入该`PostService`了 ``` // src/modules/example/controllers/test.controller.tsimport { PostService } from '@/modules/content/services/post.service';@Controller('test')export class TestController { constructor( // ... private postService: PostService, ) {} // ... @Get('posts') async posts() { return this.postService.findAll(); }} ``` ### 全局模块[](#全局模块 "全局模块的直接链接") 静态模块通过`@Global()`装饰器启用为全局模块,动态模块使用`isGlobal:true`启用全局模块 全局模块启用后,只要在中心模块`AppModule`导入,其它模块就能使用啦 命令 ``` nest g mo modules/corenest g pr modules/core/services/config.service --no-spec --flat ``` 示例 - 设置`CoreModule`为全局模块 - 在`ConfigService`中写一个方法,并在`exports`中导出`ConfigService` - 在`ExampleModule`中无需导入`CoreModule`即可注入`ConfigService` ``` // src/modules/core/services/config.service.tsimport { get } from 'lodash';const config: Record<string, any> = { name: '3R教室',};@Injectable()export class ConfigService { get<T>(key: string, defaultValue?: T): T | undefined { return get(config, key, defaultValue); }}// src/modules/core/core.module.ts@Global()@Module({ providers: [ConfigService], exports: [ConfigService],})export class CoreModule {}// src/app.module.ts@Module({ imports: [ContentModule, ExampleModule, CoreModule], controllers: [AppController], providers: [AppService],})export class AppModule {}// src/modules/example/controllers/test.controller.ts@Controller('test')export class TestController { constructor( //... private configService: ConfigService, ) {} //... @Get('name') async name() { return this.configService.get('name'); }} ``` ### 动态模块[](#动态模块 "动态模块的直接链接") 如果要在模块导入时传入参数,则需要定义动态模块,动态模块同样可以利用`global`属性设置为全局模块 代码 ``` // src/modules/core/services/config.service.ts@Injectable()export class ConfigService { protected config: RecordAny = {}; constructor(data: RecordAny) { this.config = data; } get<T>(key: string, defaultValue?: T): T | undefined { return get(this.config, key, defaultValue); }}// src/modules/core/core.module.ts@Module({})export class CoreModule { static forRoot(options: { config: RecordAny }): DynamicModule { return { module: CoreModule, global: true, providers: [ { provide: ConfigService, useFactory() { return new ConfigService(options.config); }, }, ], exports: [ConfigService], }; }}// src/app.module.ts@Module({ imports: [ ContentModule, ExampleModule, CoreModule.forRoot({ config: { name: '3R教室', }, }), ], controllers: [AppController], providers: [AppService],})export class AppModule {} ```
peipeo
2026年11月8日 10:14
转发文档
收藏文档
上一篇
下一篇
手机扫码
复制链接
手机扫一扫转发分享
复制链接
Markdown文件
PDF文档(打印)
分享
链接
类型
密码
更新密码